How to Show Meeting Chats in Their Own Section in Microsoft Teams
Microsoft Teams lets you pull all your meeting chats into their own dedicated, collapsible section in the chat list. Here's how to turn it on and move it where you want.

If you spend much of your day in Microsoft Teams chat, you know there are really three kinds of chats. There are one-on-one (private) chats, where you always know who you're talking to. There are group chats, which are three or more people. And then there's the third kind — the meeting chat.
Meeting chats are their own little creation. Whenever you have a meeting or an event, everyone invited gets a chat tied to that meeting.
One quick piece of advice before we get to the new feature: don't turn a meeting chat into an ongoing group chat unless you're genuinely still discussing that meeting. I see this happen all the time, and it clutters the conversation for everyone who was only there for the event.
Now, here's the feature I really like: you can pull all of your meeting chats out into their own dedicated section in the chat list, so they're no longer mixed in with everything else.
Start with your current chat list
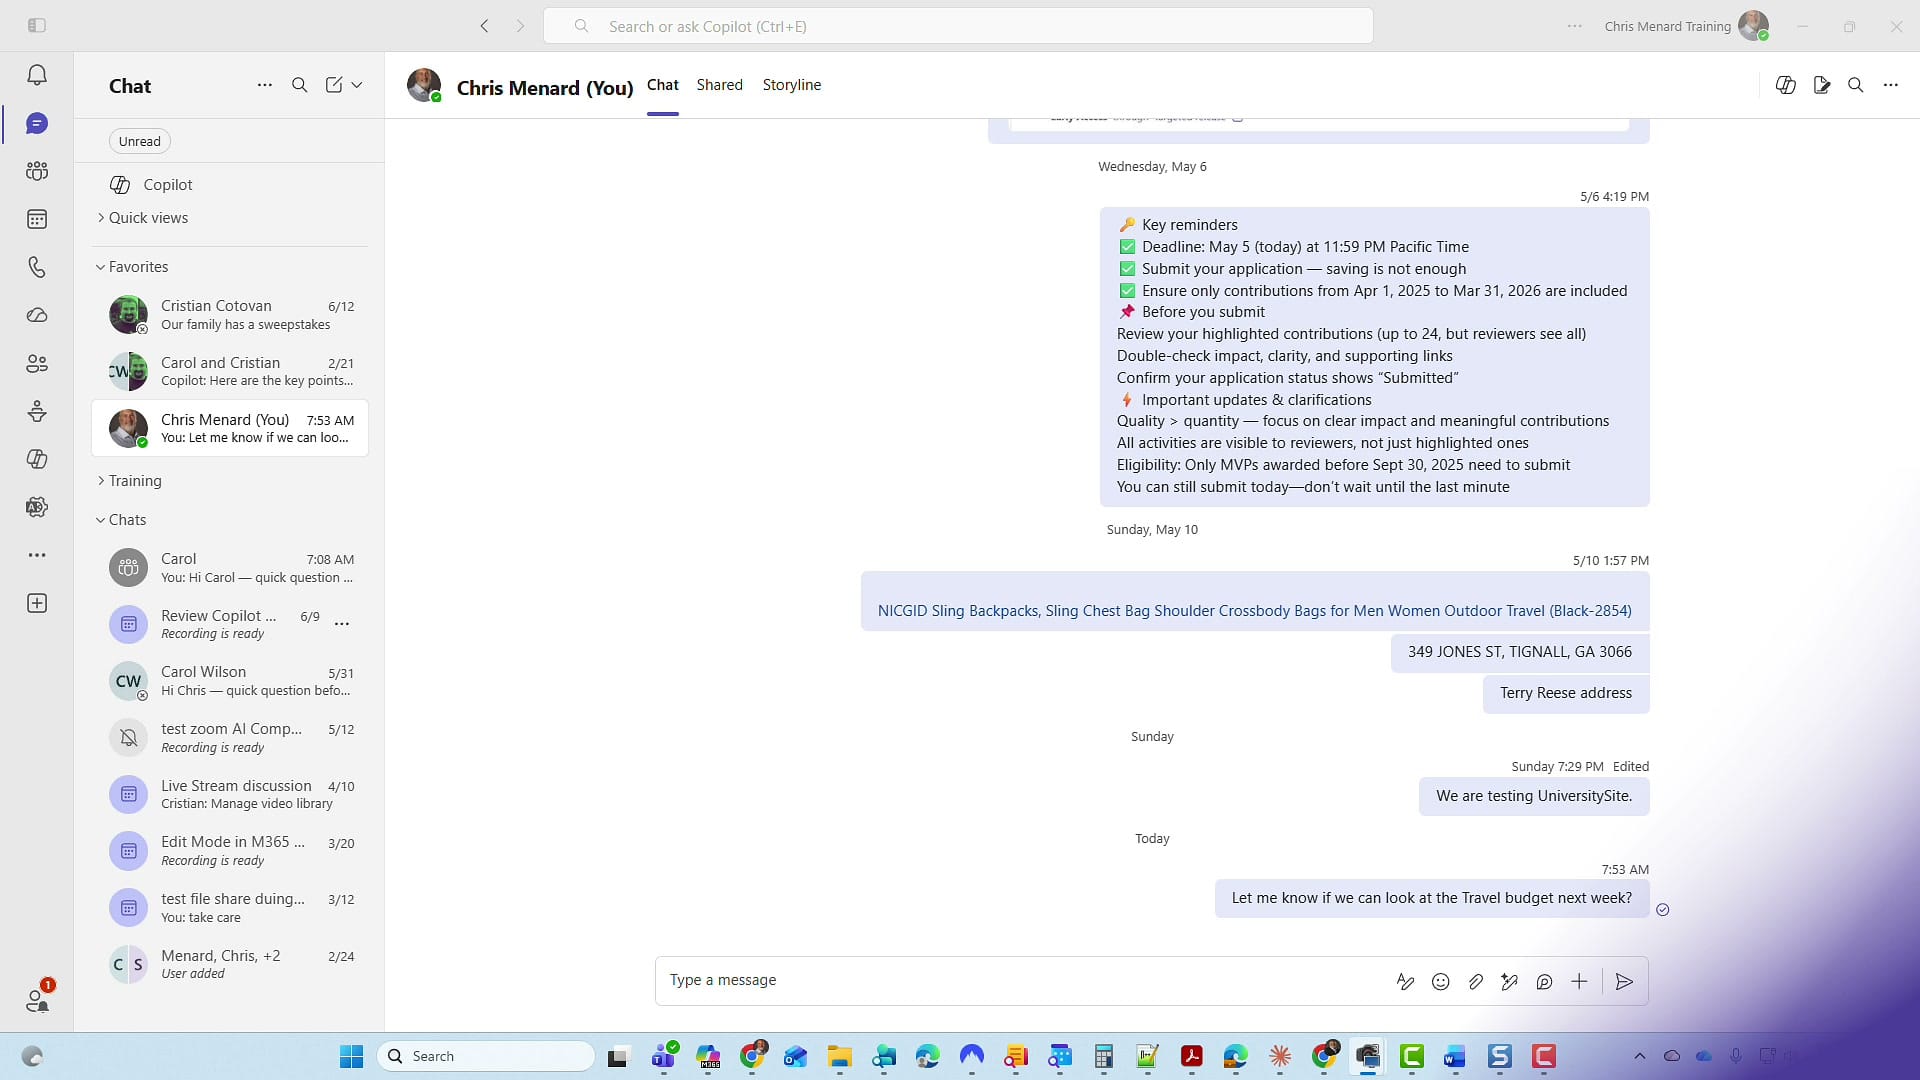
Open Chat in Teams and take a look at how your list is organized. In my setup I have a Favorites section at the top, a Training section I've collapsed, and then the regular Chats section below. Within Chats, the most recent conversation always sits at the top — you can't manually reorder individual chats. If you look closely, your meeting chats already have a small icon next to them, and you can right-click any of them to mute. But mixing them in with everything else is exactly what we're about to fix.
Open Customize view
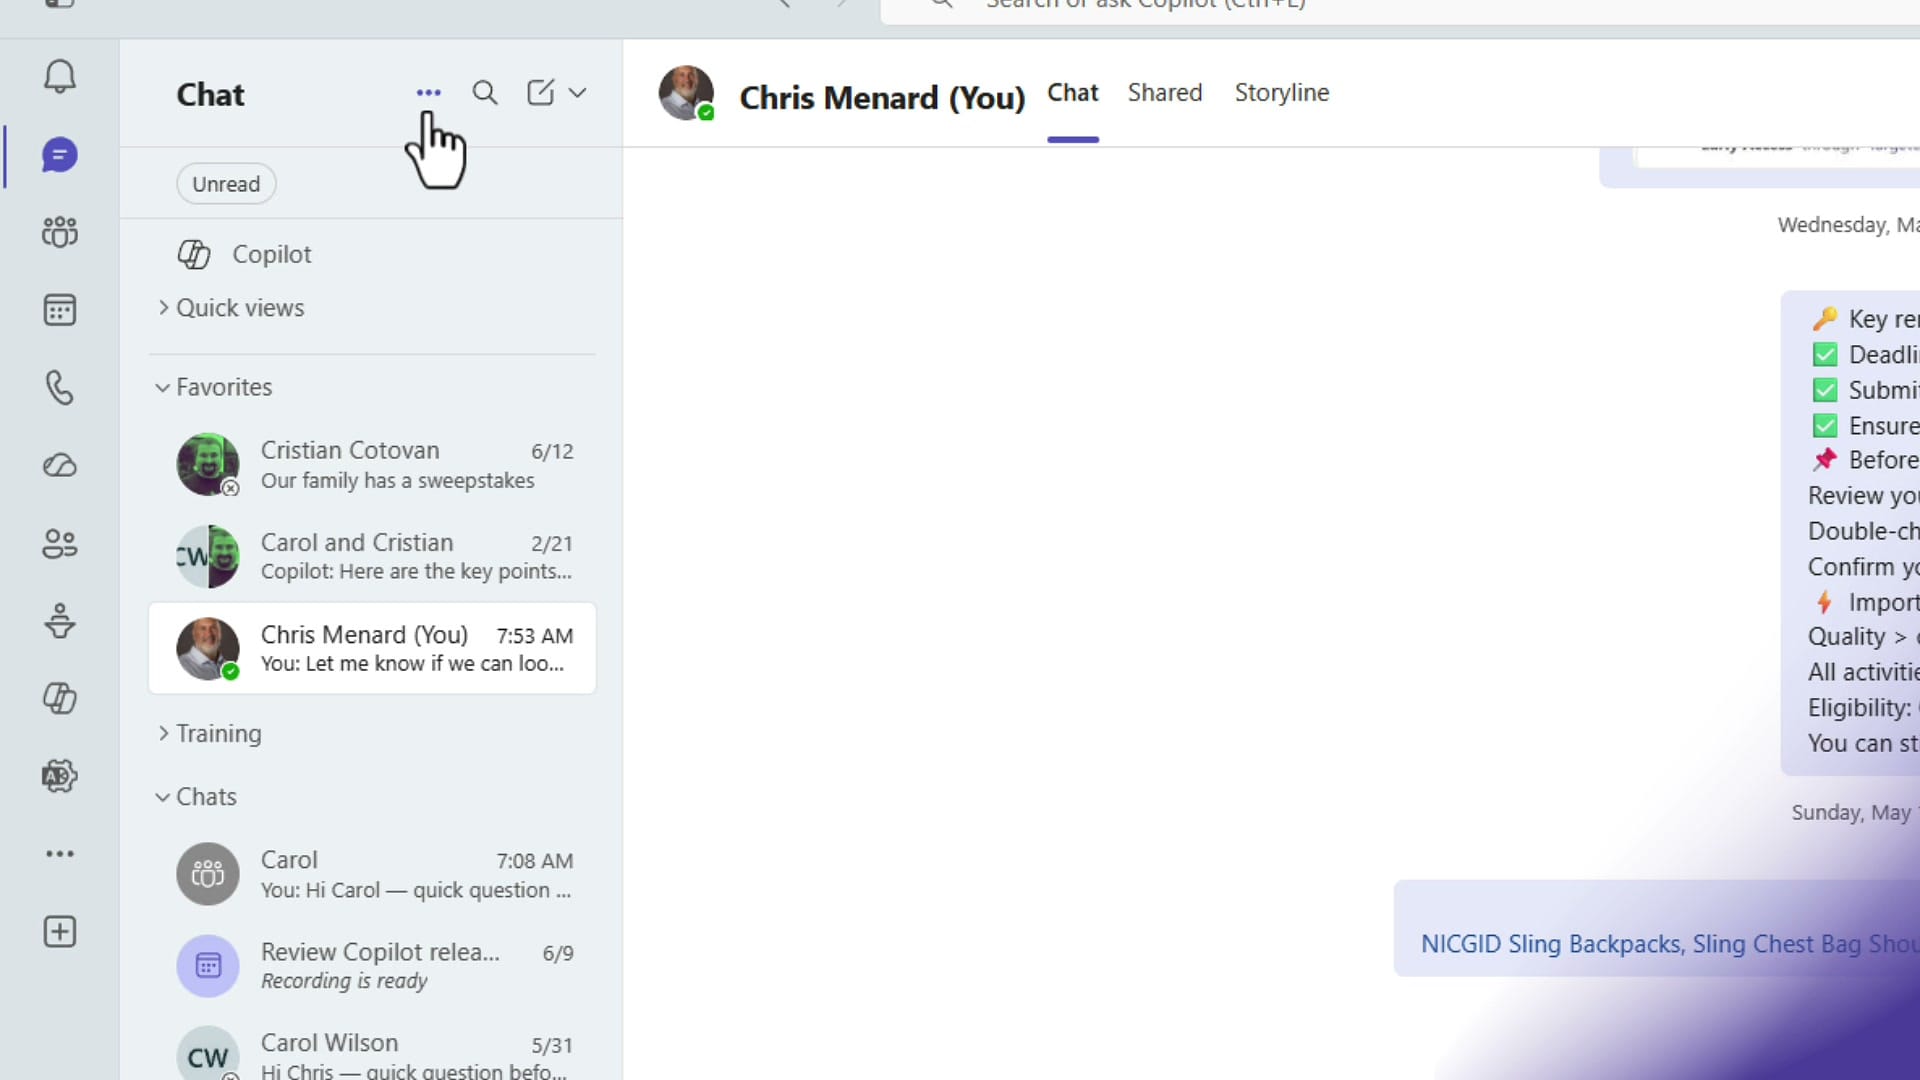
At the very top of the chat list, next to the word Chat, click the three dots for More options, then choose Customize view.
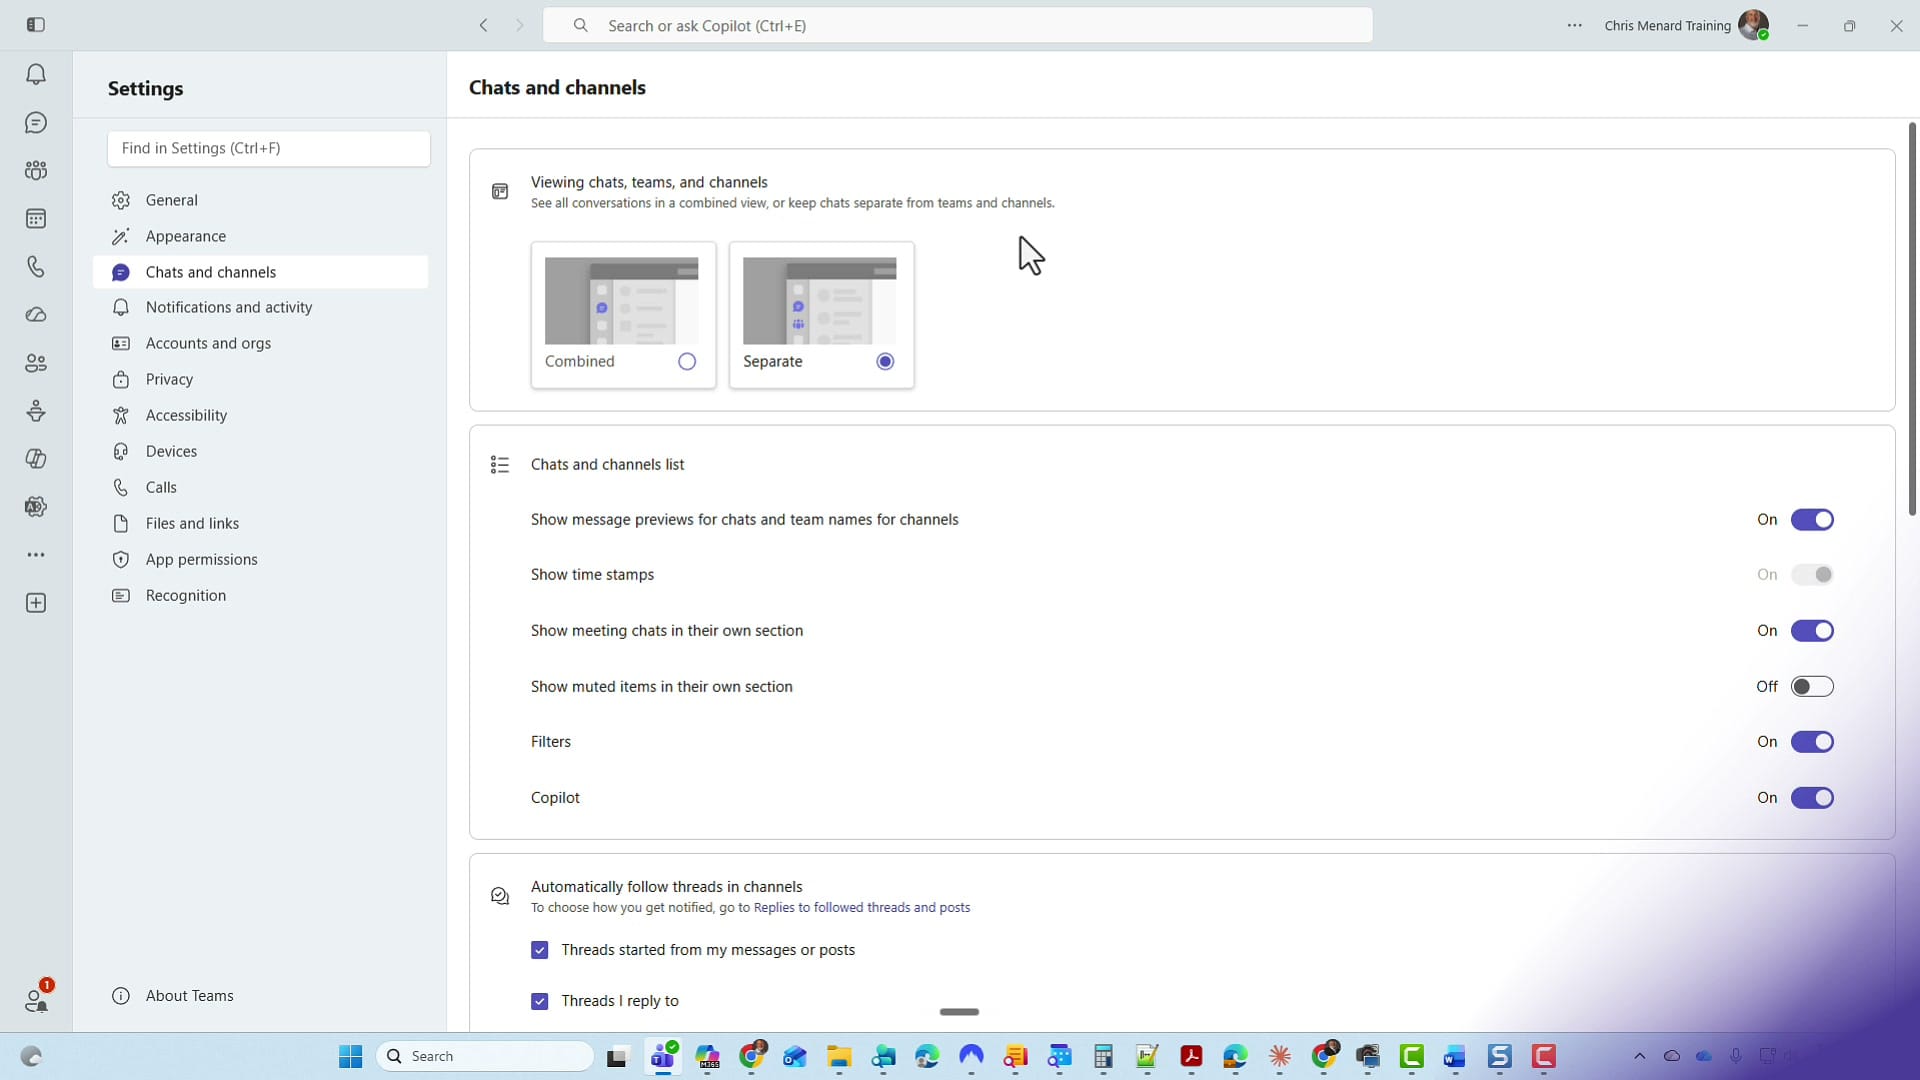
This opens your Teams settings on the Chats and channels page. You'll land right on it automatically.
Turn on the meeting chats section
Look in the middle of the page under Chats and channels list. You'll find a setting called Show meeting chats in their own section. By default, this is turned off — flip it on.
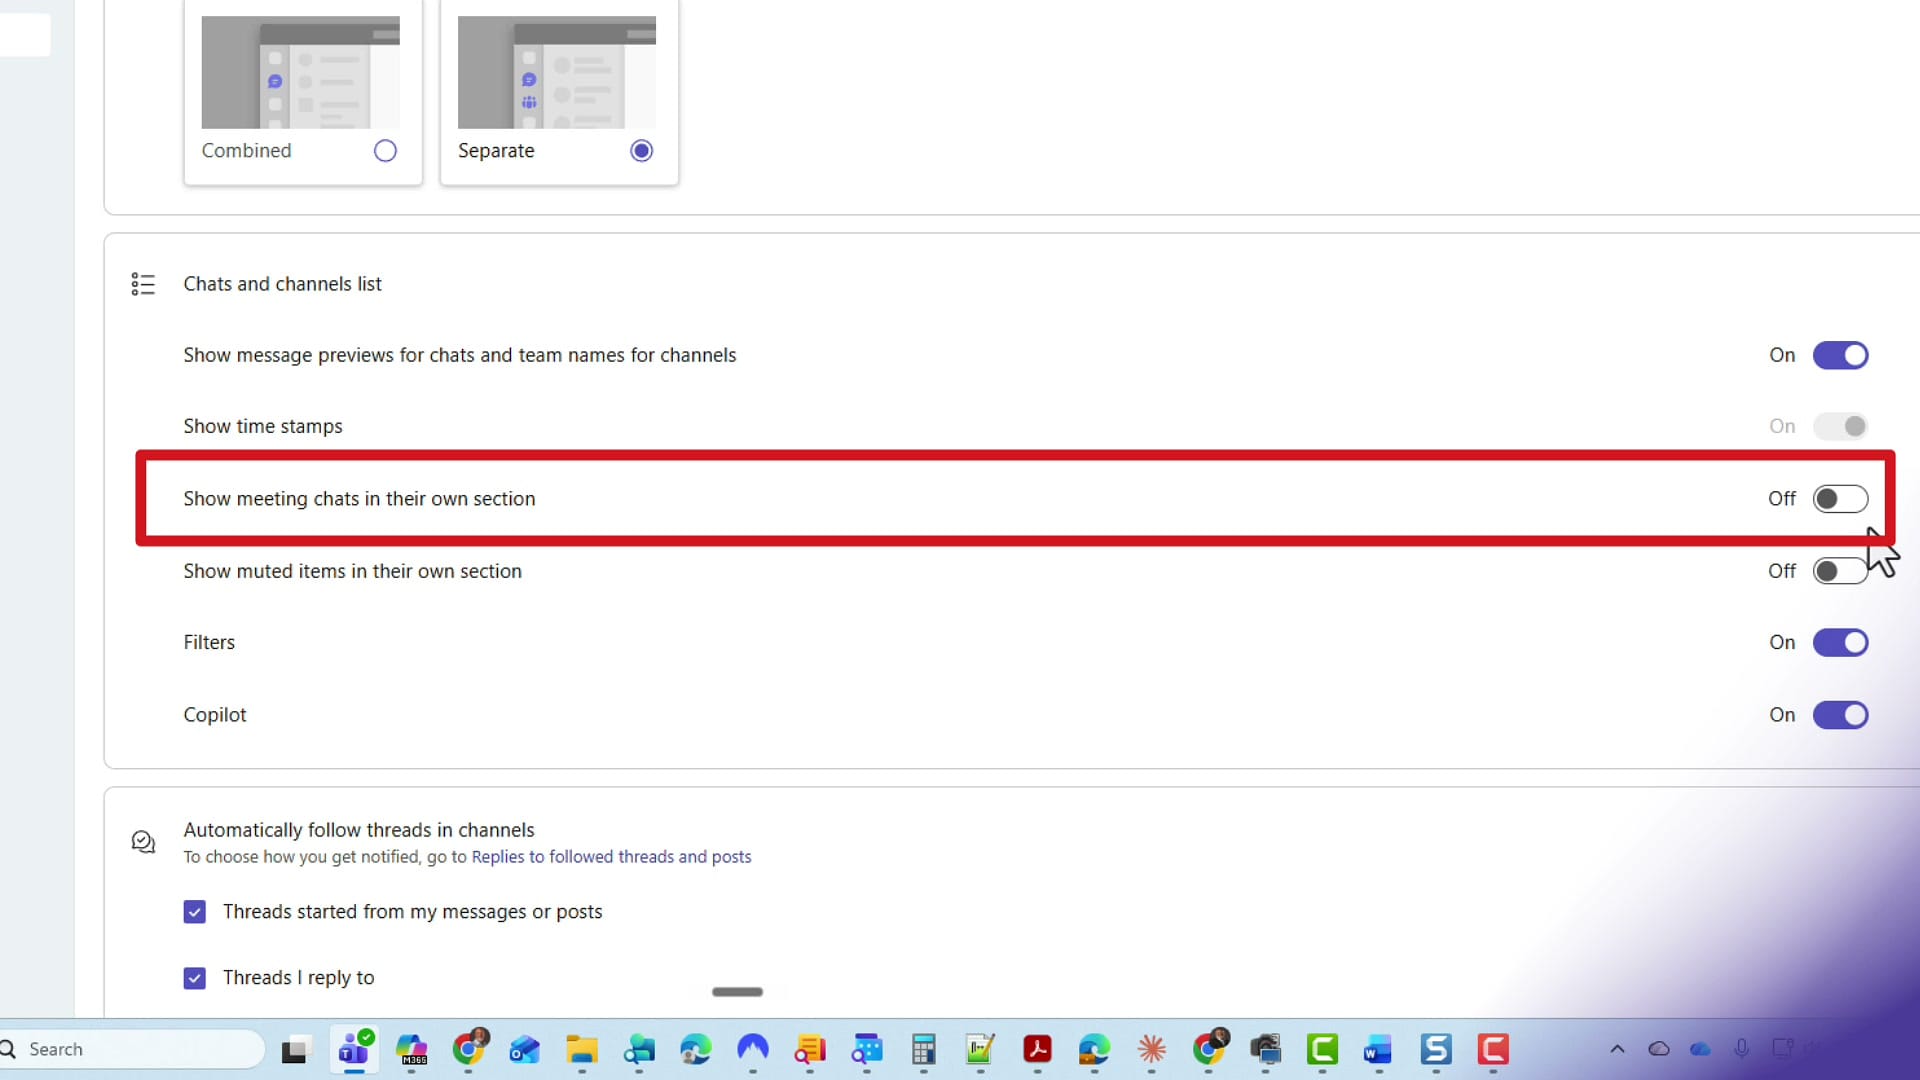
There is no Save button to click. Just flip the toggle and head back to Chat in the top left. While you're here, notice the toggle directly below it — Show muted items in their own section — which does the same kind of tidy-up for muted conversations. I walk through that one separately in my guide on the new Muted chat section in Teams.
Your new Meeting chats section
Back in the chat list, look below your regular chats. You'll now see a separate Meeting chats section. It starts out collapsed, and you can expand and collapse it any time by clicking the heading.
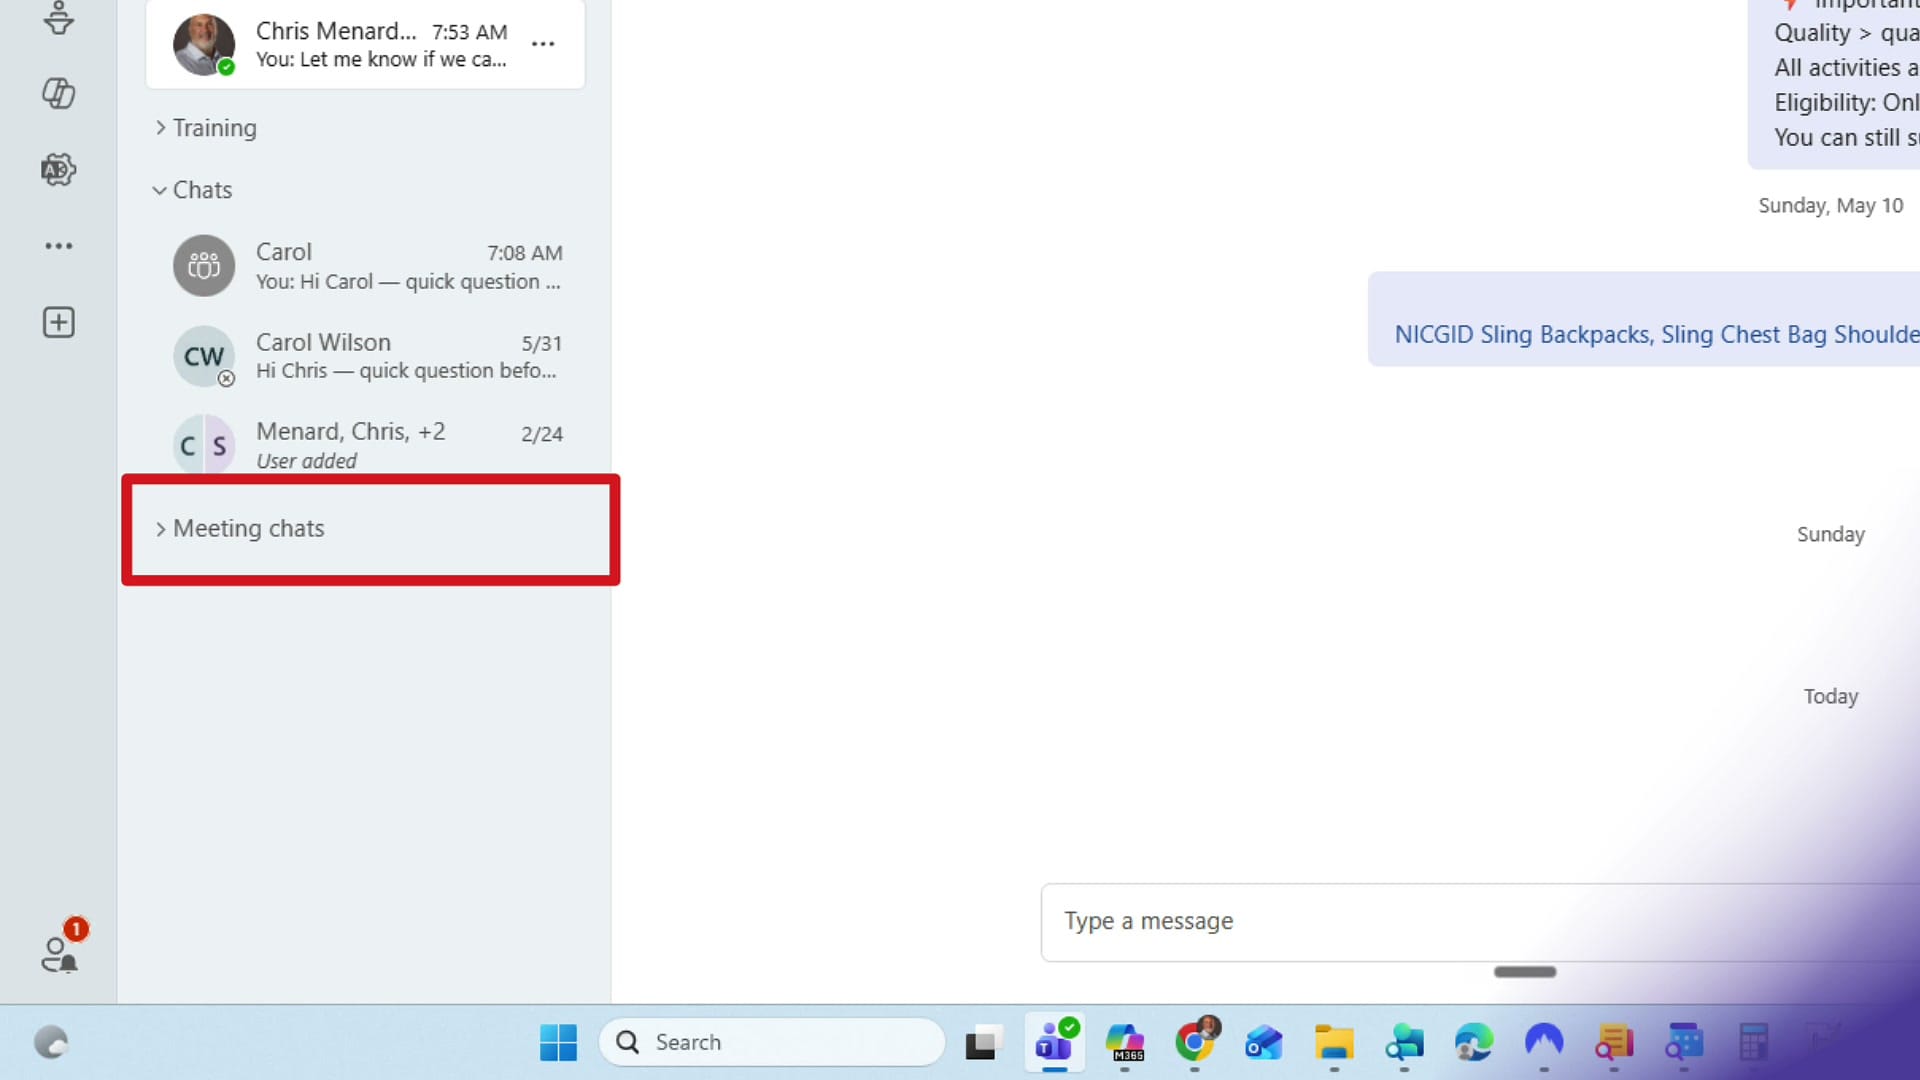
One thing worth knowing: this section is exclusively for meeting chats. You can't drag a one-on-one chat or a group chat into it — only chats tied to meetings and events live here.
Move the section wherever you want
The Meeting chats section isn't locked to the bottom. You can drag and drop the whole section and place it anywhere in your list. As an example, I dragged mine up between Favorites and Training to see how it felt.
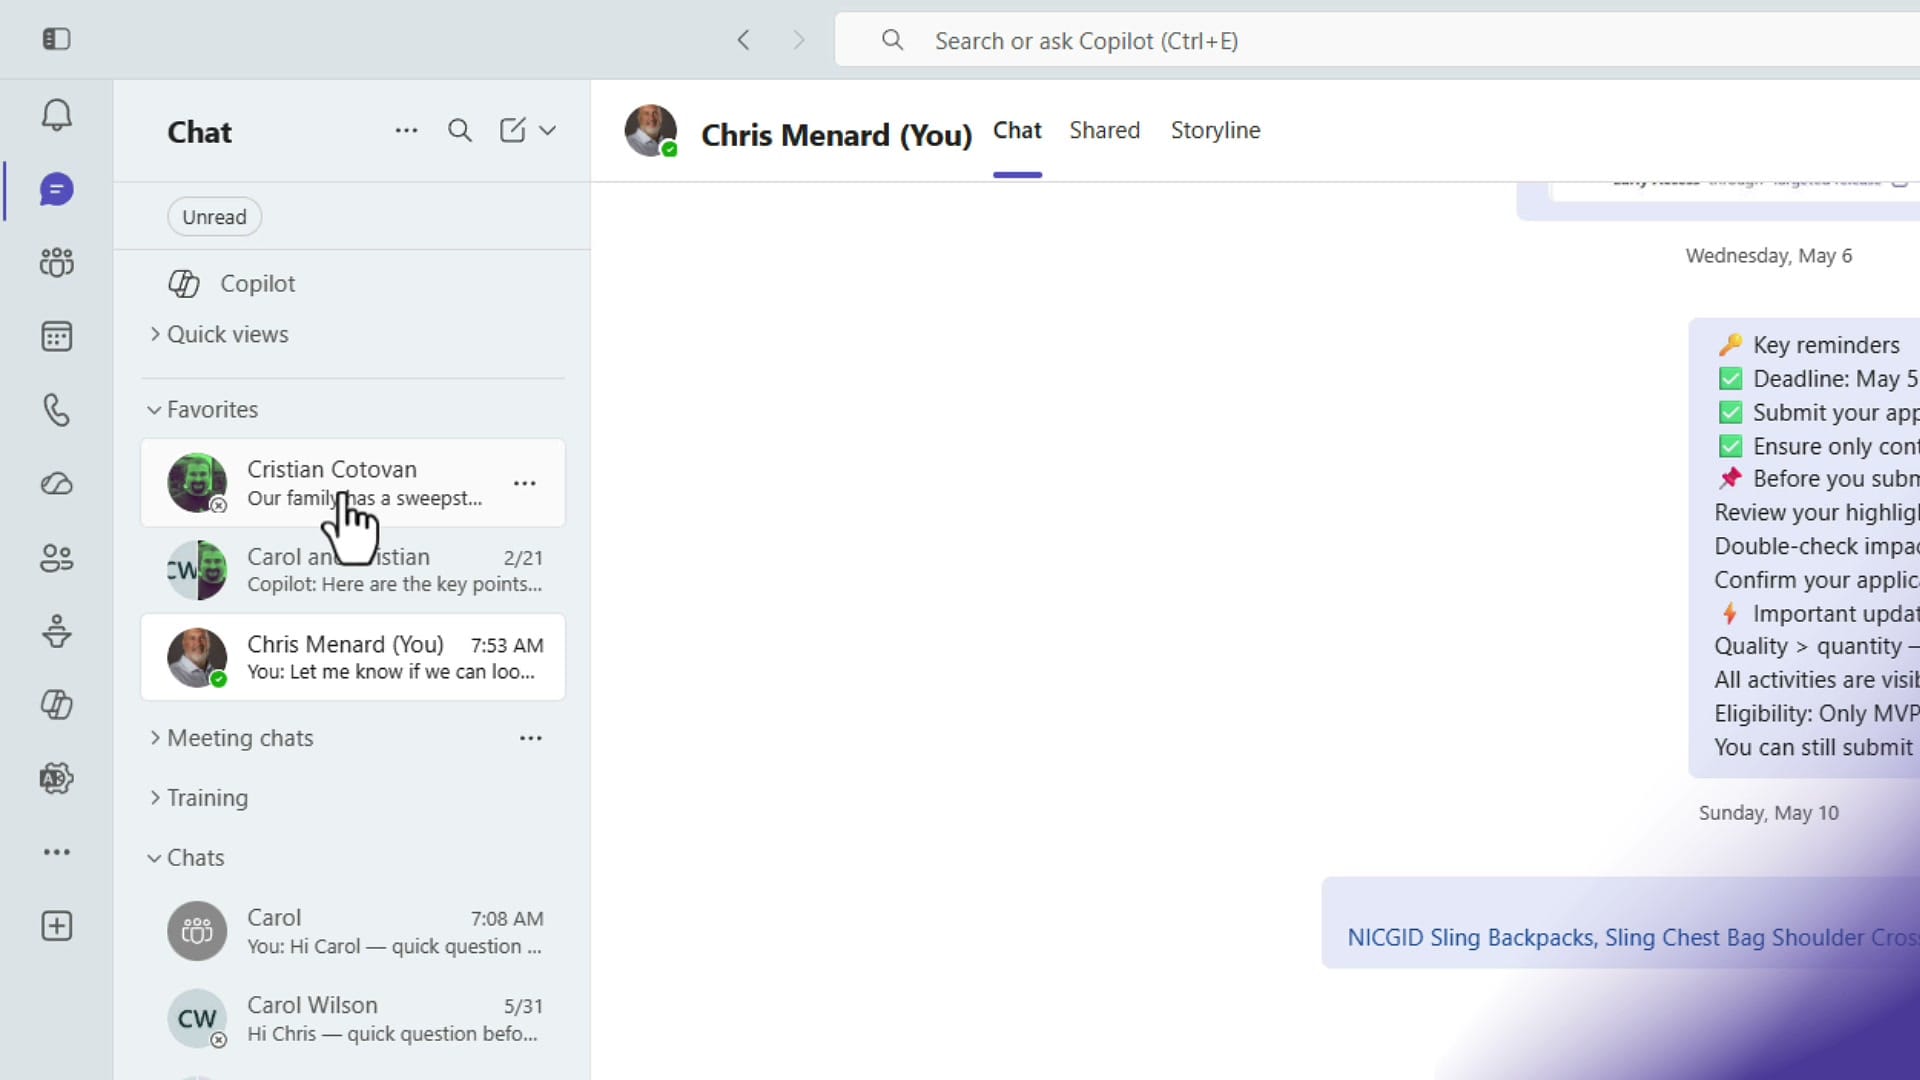
I decided I preferred it back down at the bottom, so I dragged it there again. Pick whatever order keeps your most important conversations in easy reach.
Wrapping up
That's all there is to it. Turning on Show meeting chats in their own section keeps your event conversations grouped together and out of the way of your everyday one-on-one and group chats — and you can move that section wherever it works best for you.
Related guides