OneNote Tags: How to Find and Filter Tasks Across Sections


If you use tags in Microsoft OneNote, you already know how helpful the To Do tag is for tracking tasks. But what happens when you have tasks scattered across multiple sections of a notebook? Manually clicking through each section to find your open items is tedious and easy to miss.
The Find Tags feature solves this by giving you a consolidated view of every tagged item in your notebook, with powerful filtering and grouping options.

Where to Find Tags in OneNote
Tags are located on the Home tab in the Tags group. The most popular tag by far is the To Do tag (Ctrl+1), which adds a checkbox next to any line of text. There is also an Important tag (Ctrl+2), along with many other built-in options like Question, Remember for later, and more. You can even create your own custom tags.

Click the dropdown arrow in the Tags group to see every available tag. Each one has a keyboard shortcut for quick access.
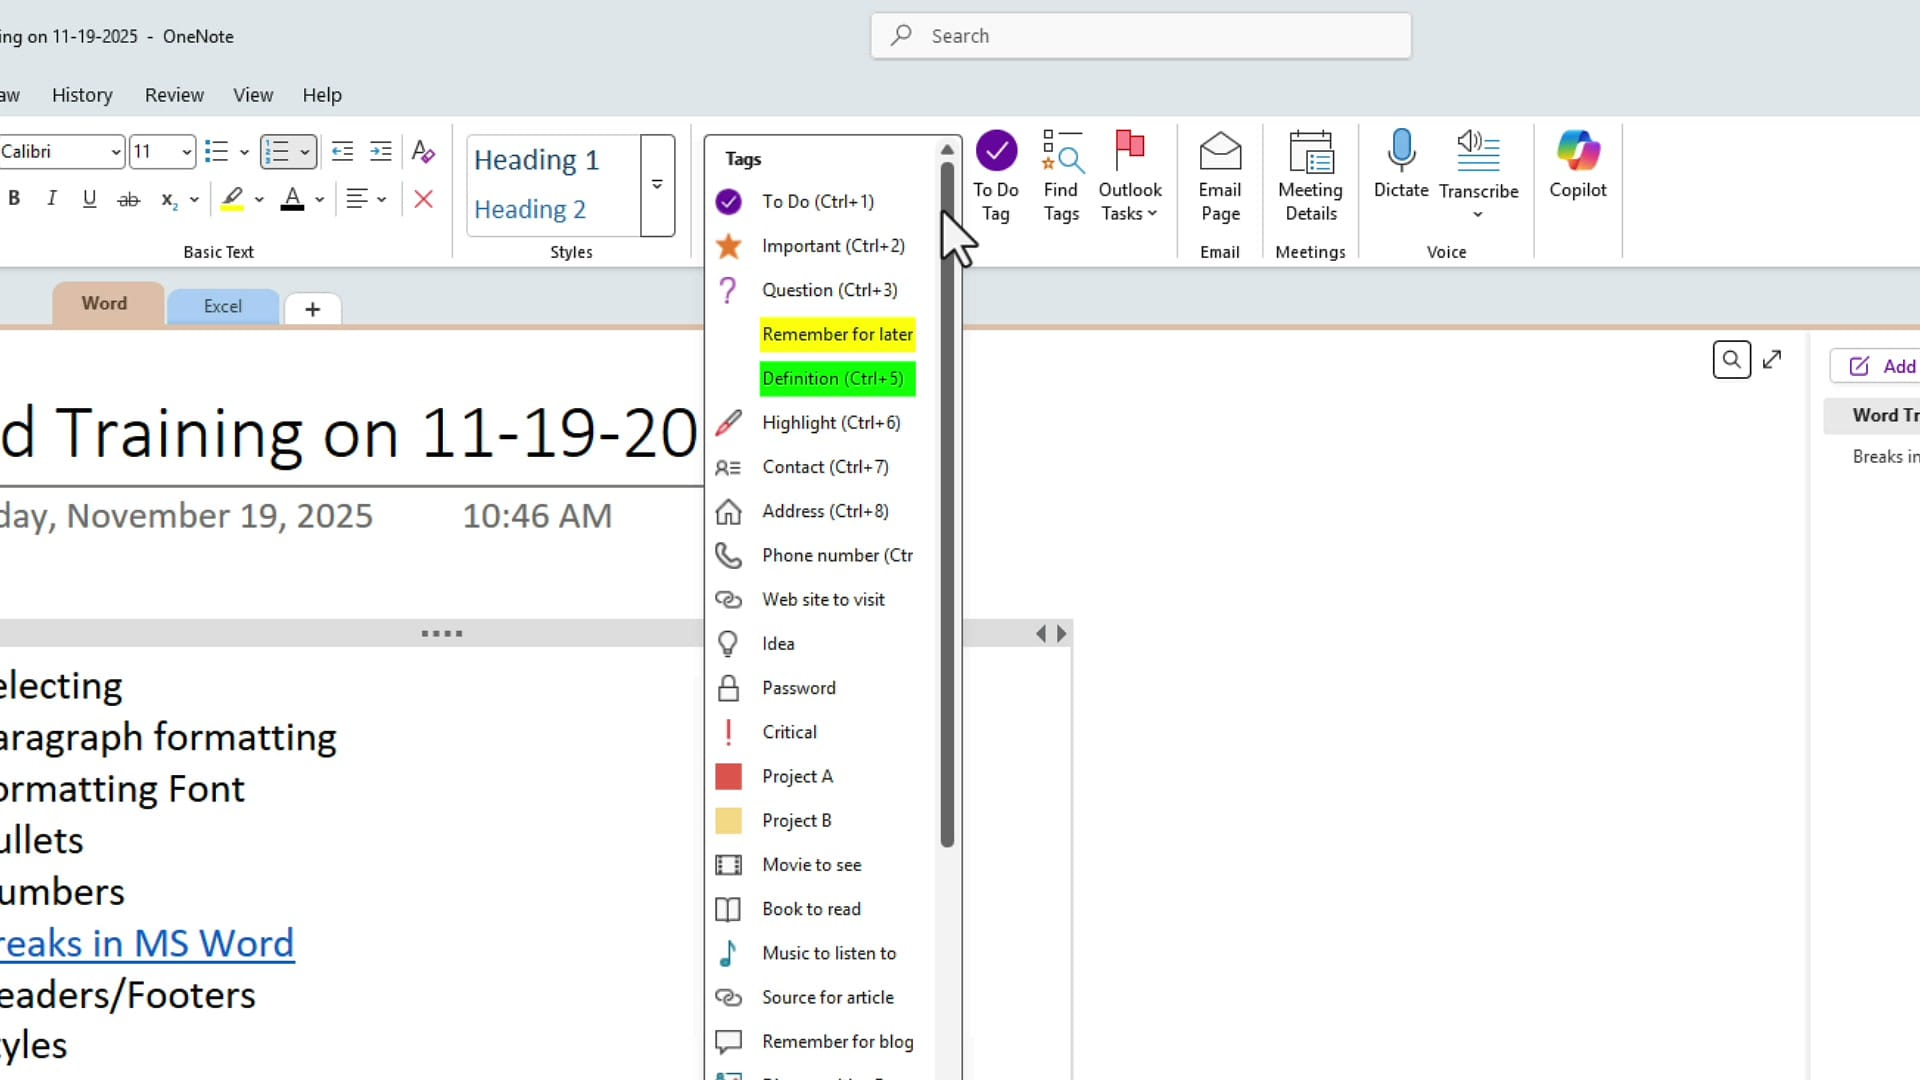
Applying Tags to Your Notes
To apply a tag, select a line of text (or place your cursor on it) and click the tag you want, or press its keyboard shortcut. For example, highlight an item and press Ctrl+1 to add a To Do checkbox. As you work through your notes, you can check off completed items by clicking the checkbox.

Multiple Tags on One Item
An item can have more than one tag. If you keep clicking a tag on the same line, OneNote adds it. For example, you might mark something as both a To Do item and Important, so it gets both the checkbox and the star icon.

Finding Tags Across Sections with Find Tags
Here is where it gets really powerful. Imagine each section in your notebook represents a different client, project, or topic. You want to see all your To Do items across every section in one place, without clicking through each one individually.
In the Tags group on the Home tab, click Find Tags. This opens the Tags Summary pane on the right side of the screen.
Default View: Group by Tag Name
By default, the Tags Summary groups results by Tag name. You will see all your Important items listed together, all your To Do items listed together, and so on. Each item is a clickable link that jumps you directly to that note.
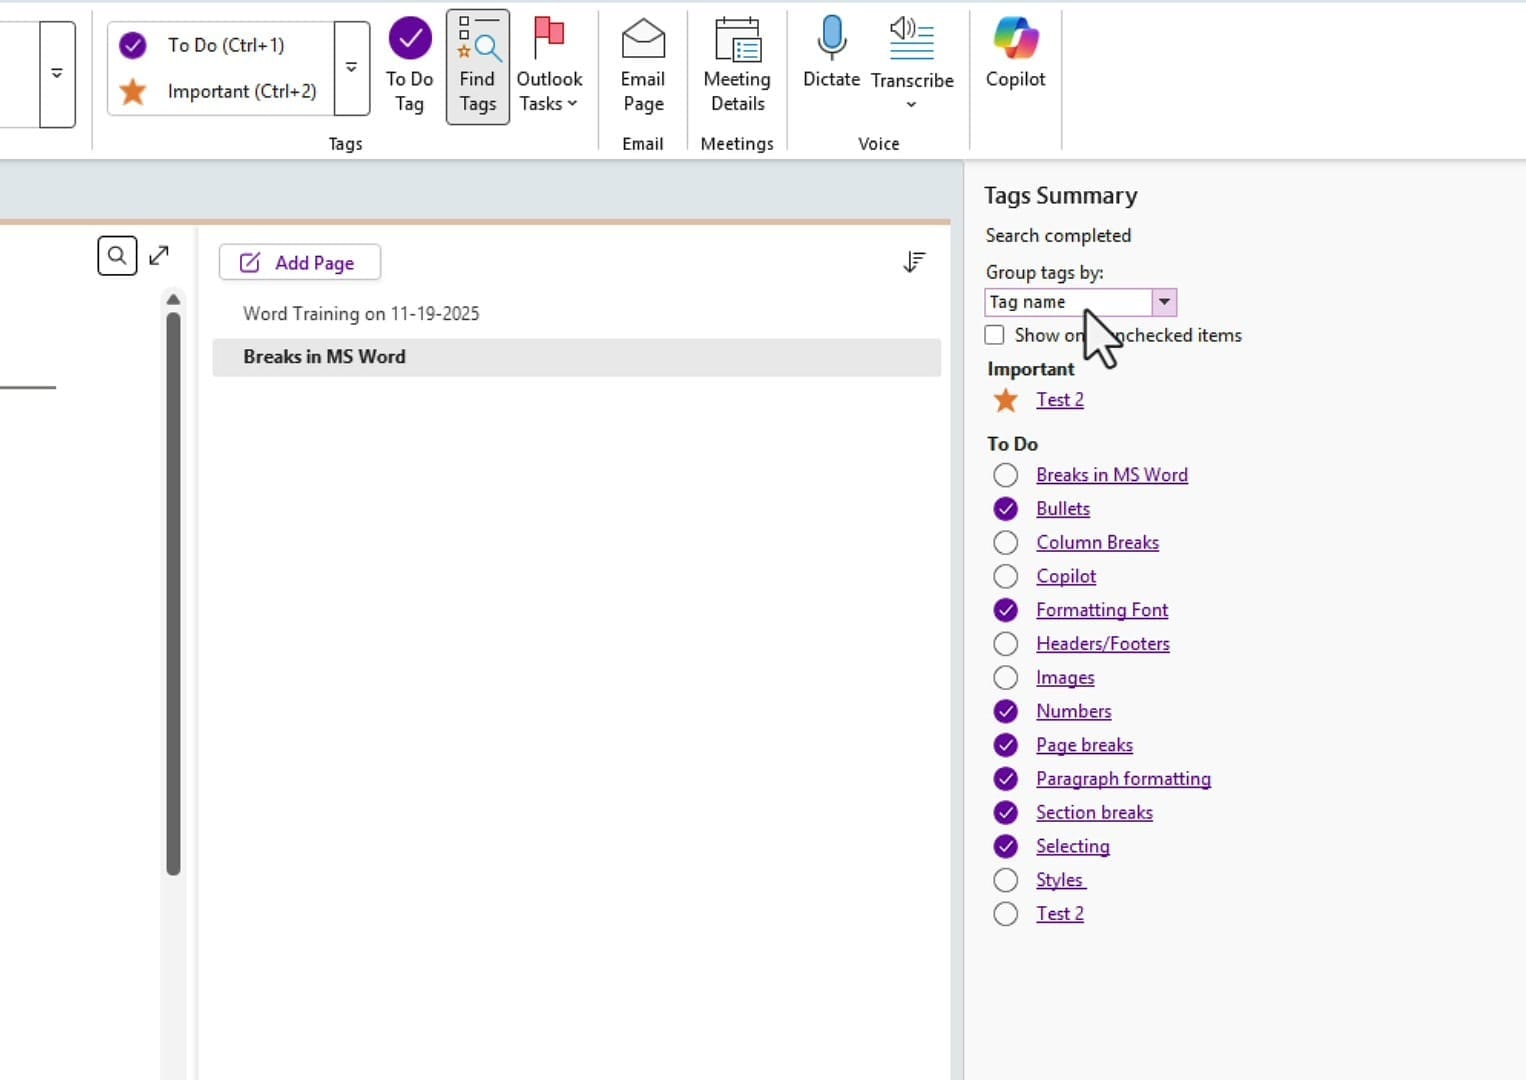
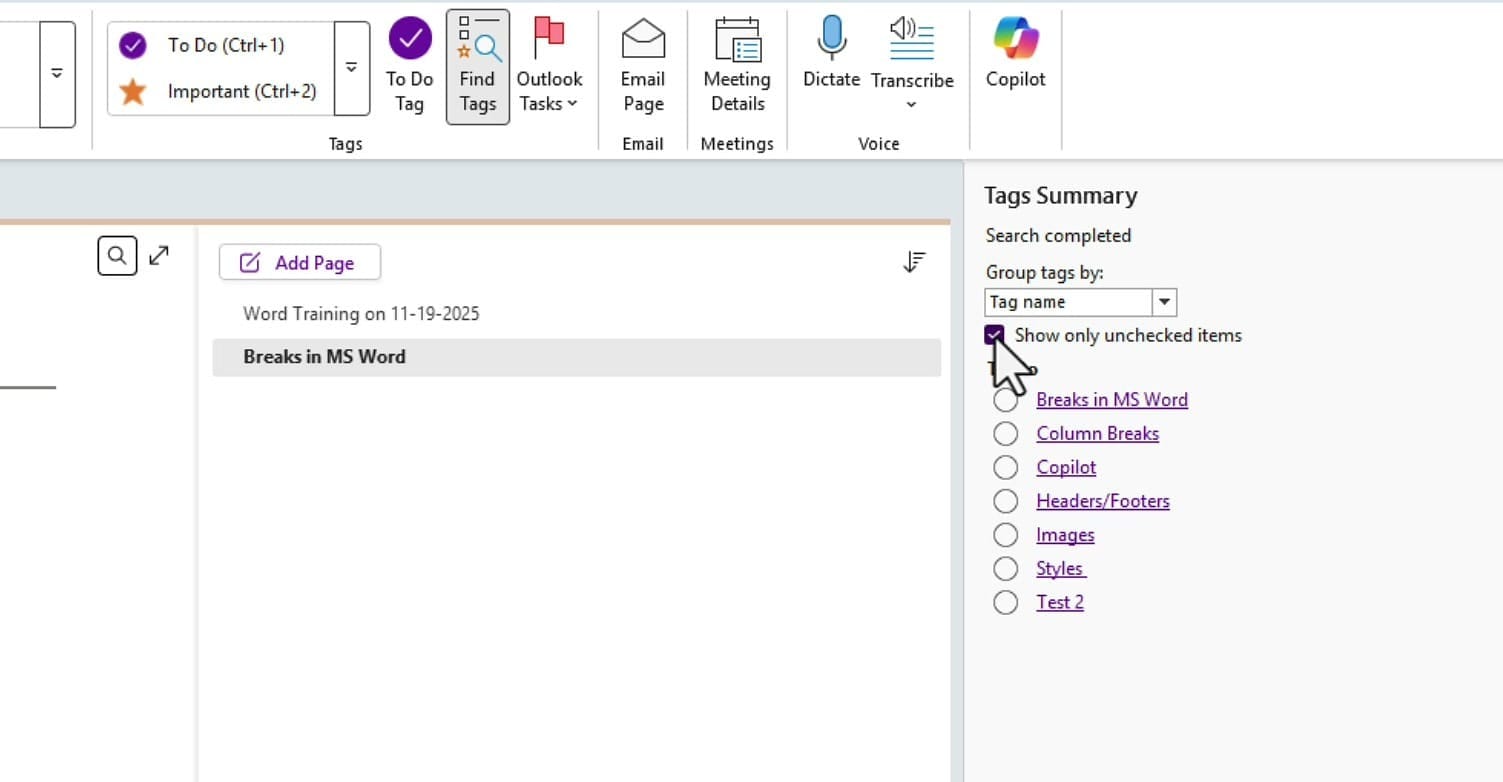
Show Only Unchecked Items
Check the Show only unchecked items box to filter out anything you have already completed. This instantly narrows the list to only the tasks that still need attention.
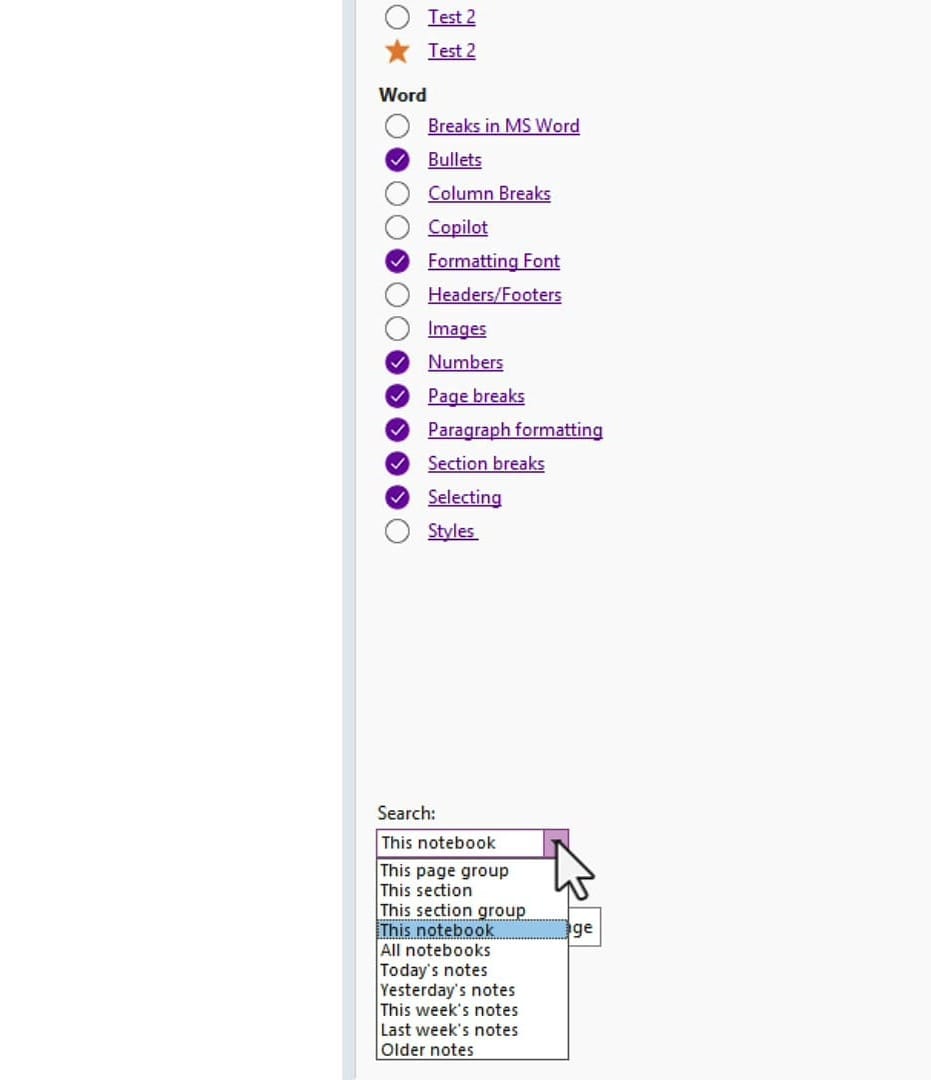
Group by Section — The Real Power
Change the Group tags by dropdown from "Tag name" to Section. Now your tagged items are organized by which section they belong to. If your sections represent clients, you can instantly see what outstanding tasks you have for each client. This is the feature I use all the time at work.
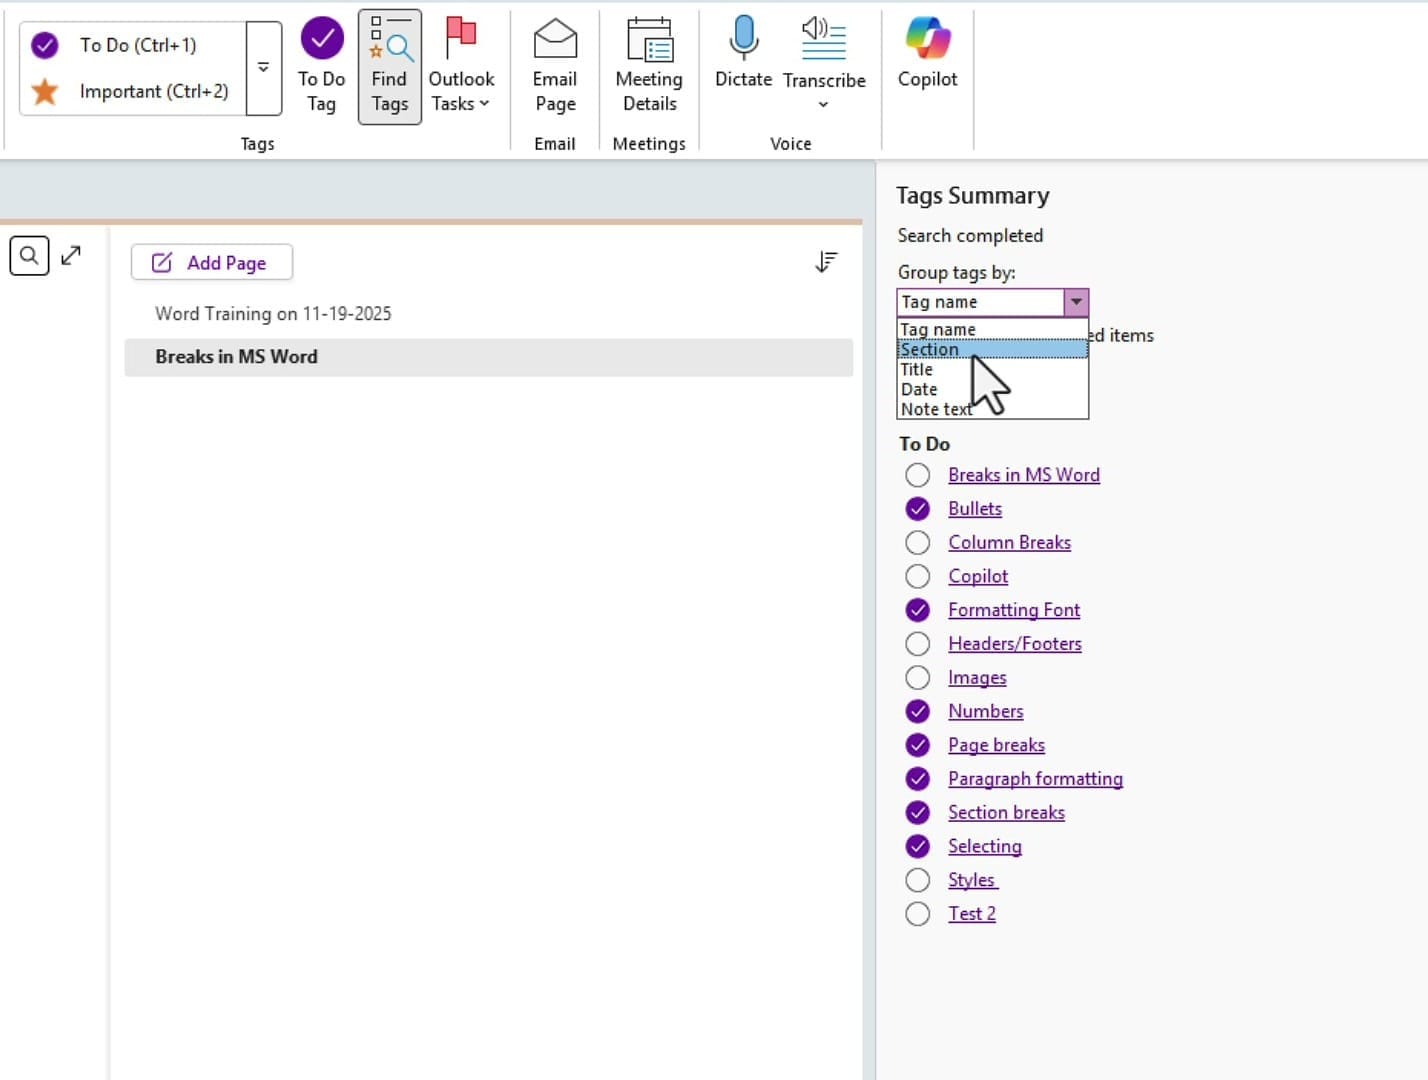
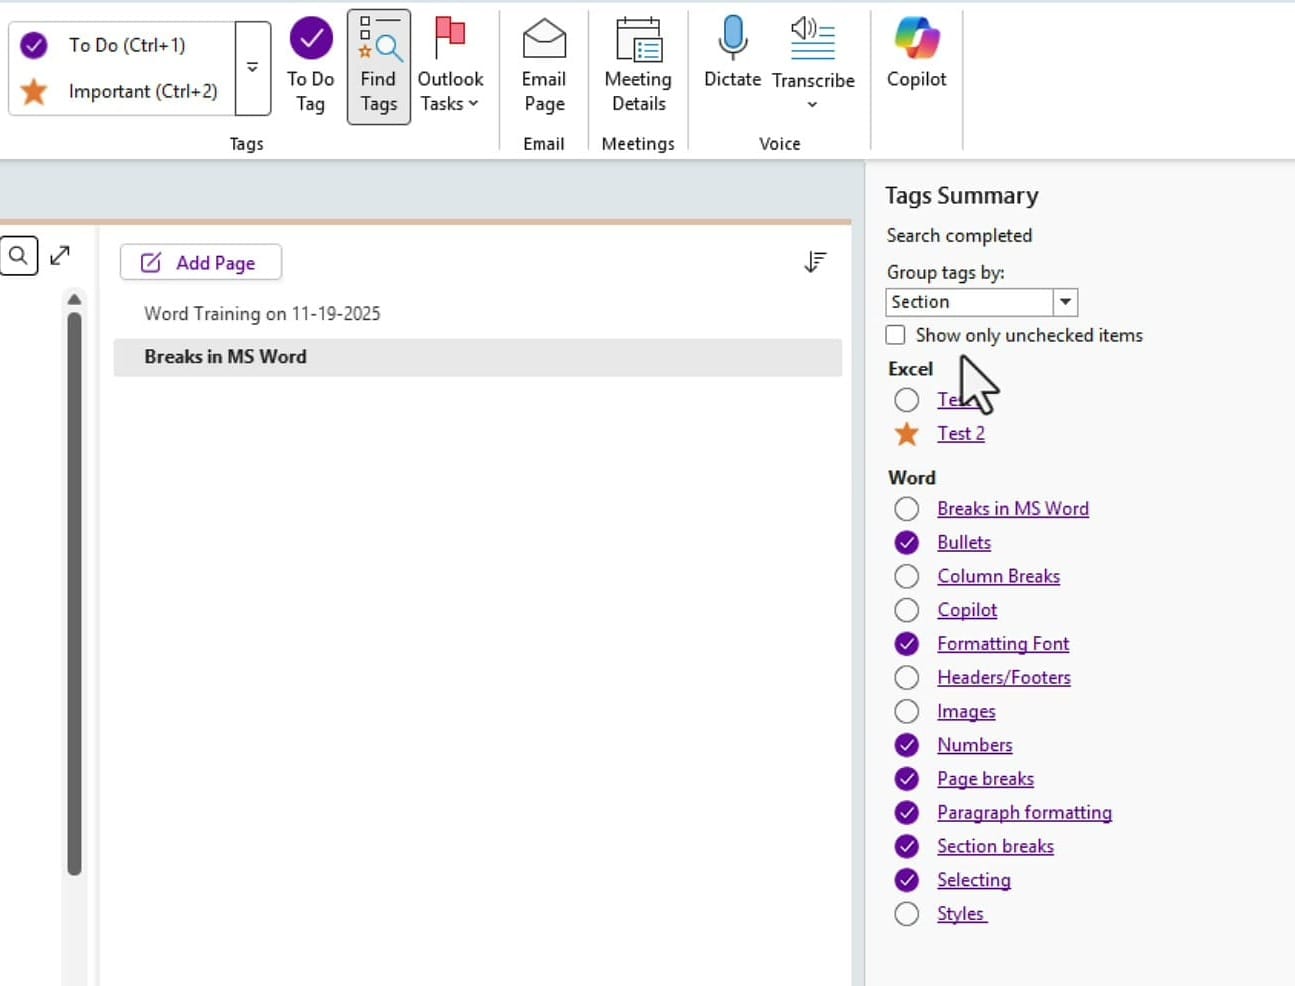
You can also combine this with the Show only unchecked items checkbox to see only outstanding tasks per section — a fast way to check what is left to do for a specific client before a meeting.
Controlling the Search Scope
At the bottom of the Tags Summary pane, notice the Search dropdown. By default, it searches This notebook, but you can change it to search a specific section, section group, all notebooks, or even filter by date (today's notes, this week's notes, and so on).
Related guides


Tags in OneNote are one of those features that seem simple on the surface but become incredibly powerful once you start using Find Tags to search, filter, and group them across your entire notebook. Whether you are tracking client deliverables, project tasks, or personal to-do lists, this workflow keeps everything visible without the need to click through sections one by one.