Word - Five Tips for Working with Heading Styles

Styles in Word are one of the best features in Microsoft Word. In this video, I give five tips for working with Styles. I use Draft view with advanced options. Outline view in Word is shown along with Printing Styles and quickly updating Heading Styles.

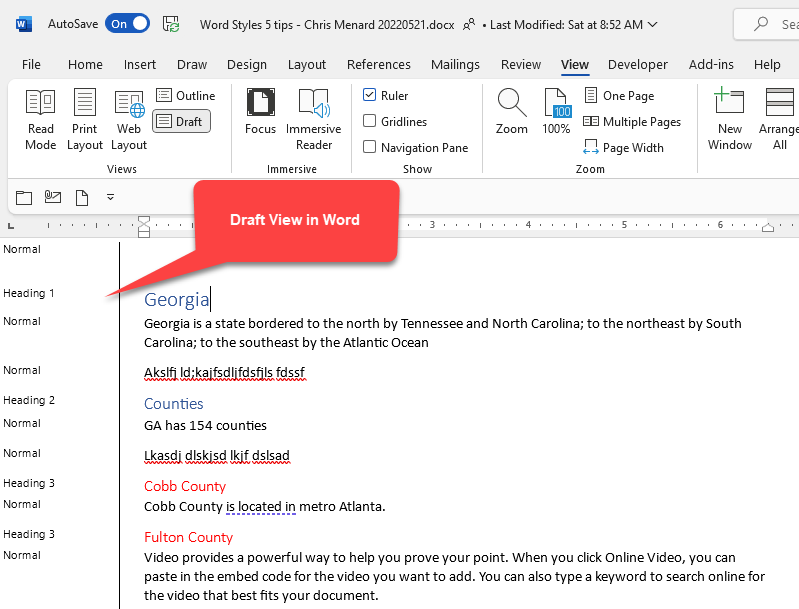
**Draft View in Microsoft Word**
YouTube Video
Word - Five Tips for Working with Heading Styles
Tip 1 - Draft View
To get to Draft view, click the **View** tab, and select **Draft**. The default view is Print Layout. To return to Print Layout, click Print Layout, which is also in the Views group along with Draft view and other views.
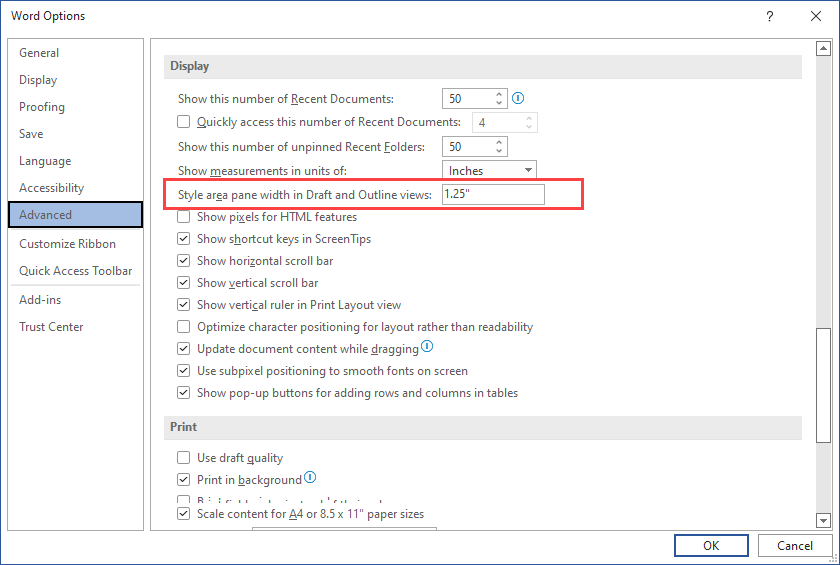
To show the Style in Draft and Outline view, click **File**\- **Options**, then click **Advanced**, and set the width in the **Style area pane width in Draft and Outline views** box. In my example, I typed in 1.25. Finally, click **OK**.

**View Tab - Draft in Views Group**

**Style Areas Pane Width in Draft View**
Tip 2 - Outline View
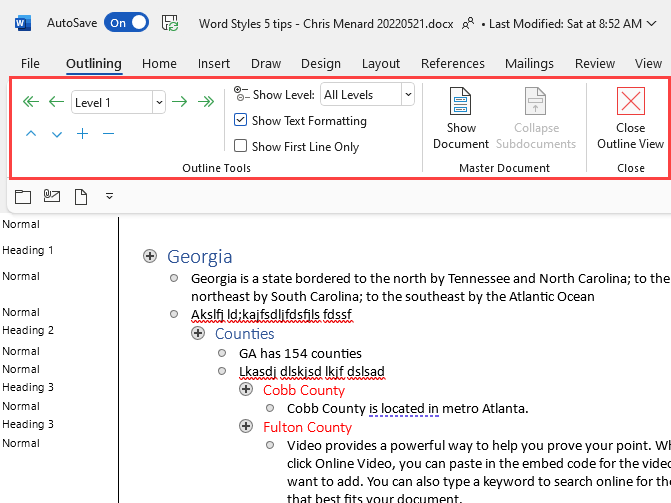
Outline view, which is under the Views tab, is excellent for seeing your headings styles used in your document. If you only want to see Heading 1 Styles, in Outline view, you would change Show Level from All Levels to Level 1.

**Outline View in MS Word**
Tip 3 - Print Styles
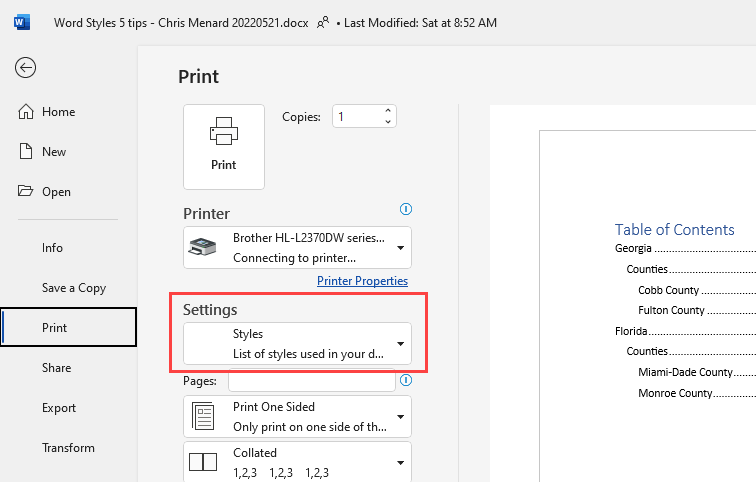
Need to print the styles used in your document. That is easy to do.
1. Click **File**\- **Print** 2. Under **Setting**, click to change **Print All Pages** to **Styles**. 3. Print to a printer or a PDF file.

**Word - Print Styles**
Tip 4 - Update Headings Quickly
When using Styles, they have a default color, font, font size, and other defaults. Maybe all your heading 2 styles are the blue font; You want them in red font color. You have 100 heading 2 styles in your document. Right, click Heading 2, modify, and change the font color. All Heading 2 styles change.

**Word modify heading styles**
Tip 5 - Create a Table of Contents
Here is a short video on Three Reasons I love Styles in MS Word
3 Reasons I Love Microsoft Word Styles | Apply Styles | Create TOC | Navigation


