Outlook mail merge - personalize email messages

You can send an email message out to a contact group (distribution list), or just manually put everyone on the TO or BCC line, but if you want to personalize each recipient’s email message, you need to do a mail merge. Why would you want to do this? If you have 300 customers with Sales Reps, and the Reps are changing which customers they serve, you would email all the customers and include the new Sales Rep contact information.
I’m going to demonstrate how to do an email mail merge using Microsoft Outlook. The advantage of personalizing the email message is the recipient is more likely to read it. This is a great tool for emailing customers, vendors, contractors, invitations to corporate events, or even employees.
There are three things required to do this. All three are part of Microsoft Office. This works in Office 2007, 2010, 2013, and 2016. What you need:
1. Microsoft Excel 2. Microsoft Word 3. Microsoft Outlook
Microsoft Excel – data source
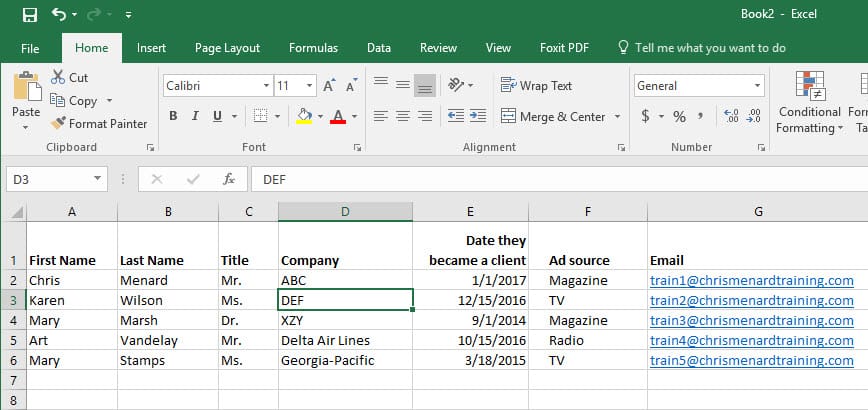
I recommend you put your data source in Excel. If you were emailing customers, this information would probably include First Name, Last Name, Title, Company, Sales Rep, email address, etc. See the image below.
YouTube video on email mail merge
Mail Merge with Outlook, Word, and Excel by Chris Menard - YouTube
Microsoft Word – perform email mail merge
All mail merges are done in MS Word. After creating your Excel file, start MS Word and do the following. This happens at 00:32 in the video above.
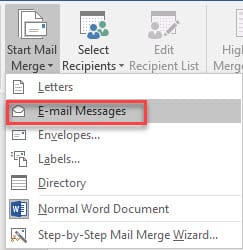
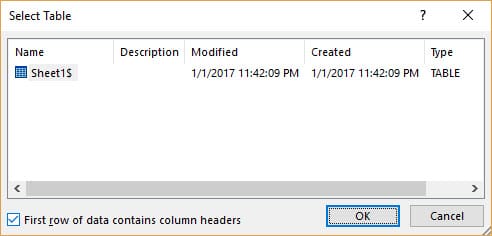
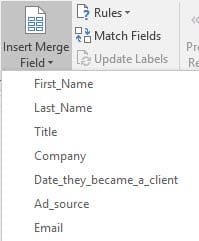
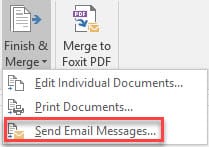
1. Start MS Word. 2. Switch to the **Mailings** Tab. 3. Click on the **Start Mail Merge** menu and select the **E-Mail Messages** option. 4. Click on the **Select Recipients** menu and select the **Use Existing List** option. 5. Browse and select the Excel spreadsheet you created earlier, and then click on the **Open** button. Select the correct worksheet from Excel. 6. Compose the body of your message using Word 7. **Insert Merge Field** menu and select the field containing the data you want to insert. 8. Click on the **Finish & Merge** menu and select the **Send E-Mail Messages** option. Add a Subject to your emails.
Photo gallery of the steps above

Microsoft Outlook
The last step is to go to Microsoft Outlook, click on the Sent folder and you should see all the emails that were sent. Each recipient should receive a personalized email message.
Disadvantages of sending Mass Emails
There are some disadvantages to doing a mail merge.
1. It is much simpler to send the message and place the recipients on the TO or BCC Line of the message. 2. If you need to email out 500 personalized email messages, your server at work or ISP may not allow it. Usually, there is a daily cap on the number of email messages you can send per day. 3. You must have a data source, like an excel file for your recipients. It is possible to do the mail merge using Outlook Contacts or People but you are limited to the fields you can include in your mail merge.


