Mastering Conditional Formatting in Excel with Copilot: A Step-by-Step Guide

Mastering Excel is a critical skill for many professionals across various industries. Among the many features Excel offers, conditional formatting stands out for its ability to visually highlight important data. This feature enables users to set rules that automatically format cells based on their content, making it easier to analyze and understand data at a glance. However, despite its utility, many users find conditional formatting challenging to navigate and implement effectively.
In this guide, we delve into the world of conditional formatting with the help of Excel's Copilot feature. Copilot simplifies the process, allowing users to apply conditional formatting rules with ease. Whether you're looking to highlight specific text, dates, or numbers, Copilot can help you achieve your goals without the need for extensive Excel knowledge.

Copilot in Excel - Prompts for Conditional Formatting
Why Conditional Formatting?
- It brings attention to critical data points. - It helps in identifying trends and patterns. - It aids in error detection within datasets.
With conditional formatting, data analysis becomes more intuitive and effective. By the end of this guide, you'll have a solid understanding of how to leverage Copilot to enhance your Excel spreadsheets through conditional formatting. Let's get started on this journey to unlock the full potential of your data.
YouTube Video on Using Copilot for Conditional Formatting in Excel
Copilot in Excel: Using Conditional Formatting - YouTube
Setting Up for Copilot: Requirements
To make the most out of Copilot for Excel, especially for applying conditional formatting, there are a few requirements you need to meet. Let's go through them step by step to ensure you're ready to harness the full power of Copilot.
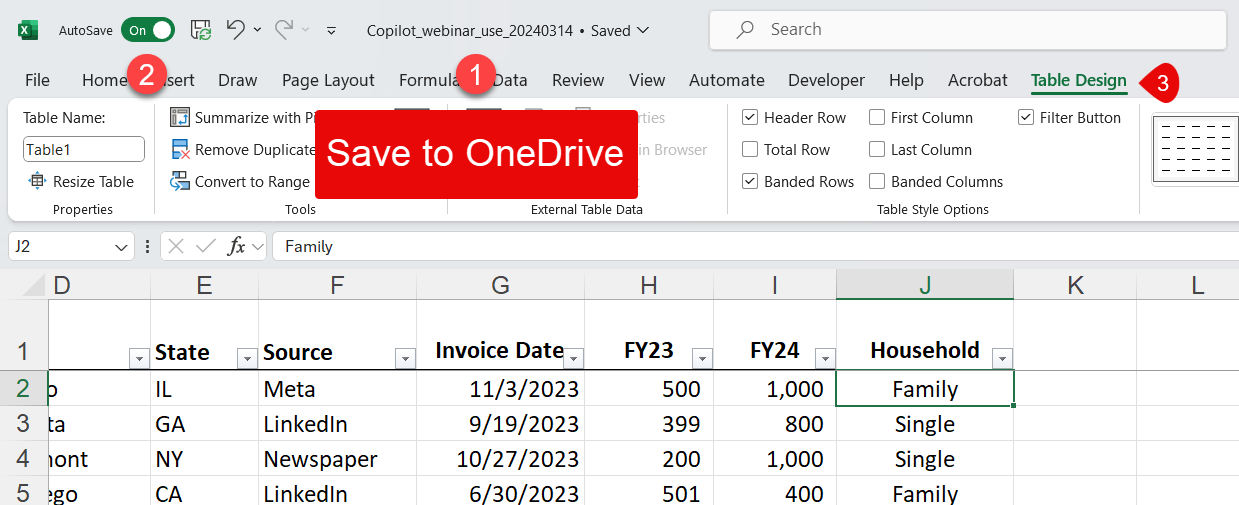
Save to OneDrive or SharePoint
The first thing I did was save my Excel file to OneDrive or SharePoint. Copilot features rely on cloud connectivity to function properly. This step is crucial since Excel needs to access the Microsoft cloud to leverage Copilot's capabilities.
Enable AutoSave
Next, I made sure AutoSave was turned on. This feature automatically saves your changes as you work, which is not only a good practice to avoid losing data but also a requirement for Copilot to work efficiently. You’ll find the AutoSave toggle at the top of your Excel window. Remember, AutoSave is only available when your file is stored in OneDrive or SharePoint.
Set Your Data as a Table
Last but not least, I converted my data into a table. This is easily done by clicking on any cell within your data range and pressing CTRL+T. Confirm the range in the dialog box that appears, and make sure to check the box if your table has headers. Setting your data as a table enhances Copilot’s understanding of your data structure, making it more effective in applying conditional formatting rules.
Meeting these requirements might seem like a bit of extra work initially. However, they are designed to make your experience smoother and more productive. Once set up, you'll find that Copilot can significantly simplify many Excel tasks, including conditional formatting.

Set up Excel to use Copilot
Diving into Conditional Formatting with Copilot
Exploring the capabilities of Copilot in Excel has truly been a game changer, especially when it comes to conditional formatting. This feature, although powerful, can sometimes be complex to navigate. Thankfully, Copilot simplifies the process, making it accessible even for those of us who may not consider ourselves Excel gurus.
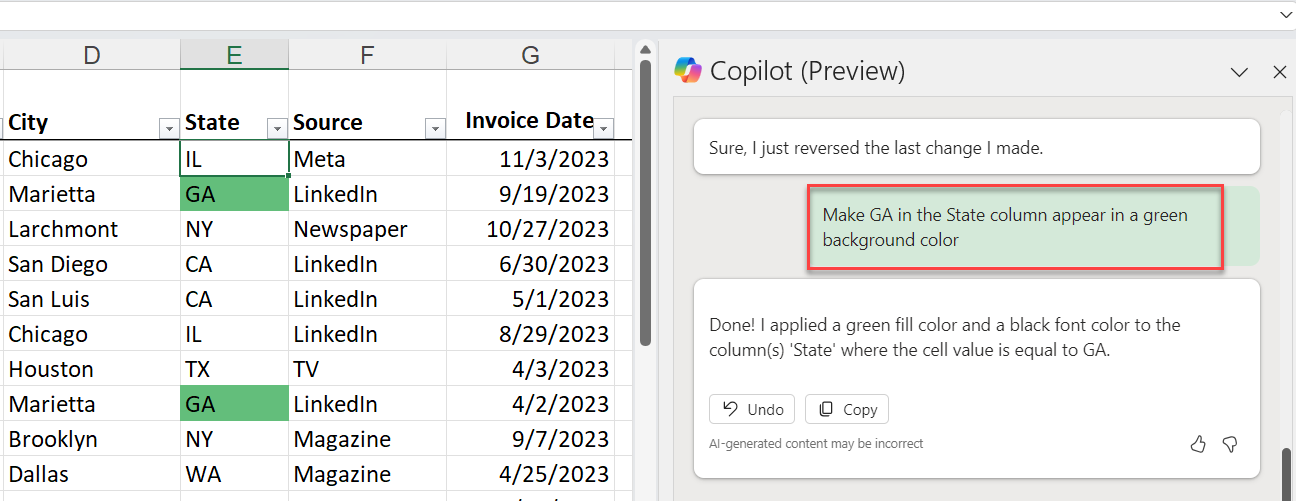
Text-based Conditional Formatting
My first experiment with Copilot focused on text. I wanted to highlight all instances of a specific state abbreviation within my dataset. With a simple prompt to Copilot, it managed to apply a fill color to these cells effortlessly. This immediate visual cue drastically improved the readability of my data.

Copilot with Conditional Formatting - Text field
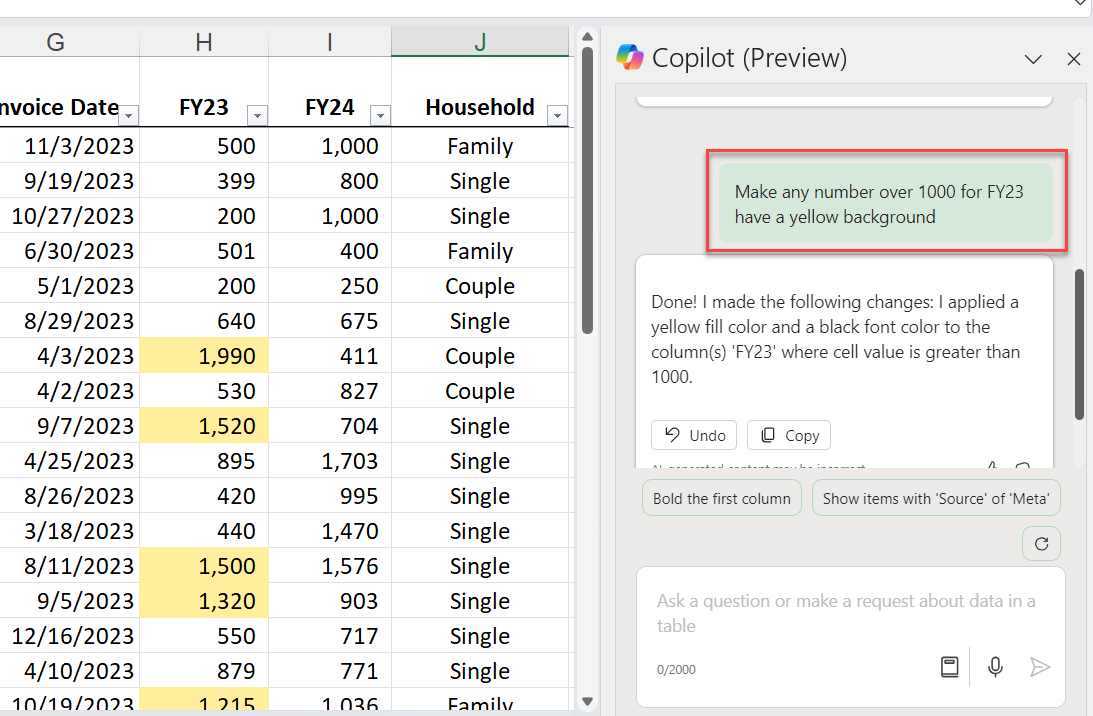
Numerical Conditional Formatting
Next up, I tackled numerical data. My goal was to highlight cells where the purchase amount exceeded a certain threshold. Again, Copilot came through brilliantly. By merely typing in what I needed, Copilot applied the correct conditional formatting rule, making those key figures stand out.
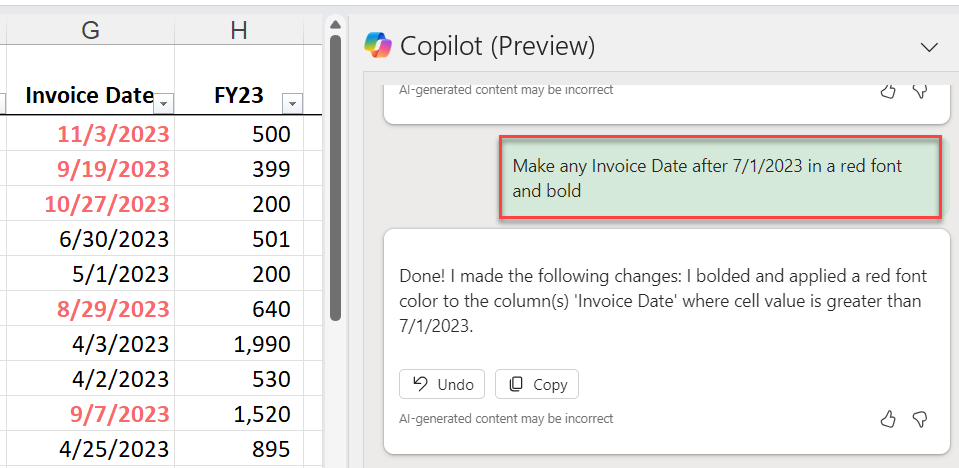
Date-based Conditional Formatting
Last but not least, I explored conditional formatting with dates. I wanted to identify recent transactions by highlighting invoice dates after a specific day. Copilot not only understood my request but executed it perfectly, marking the recent dates in a distinct font color.
The beauty of using Copilot lies in its simplicity and effectiveness. It translates my commands into precise actions, making data analysis both efficient and straightforward. Whether it's text, numbers, or dates, Copilot handles conditional formatting with ease, turning complex tasks into simple commands. This feature has not only saved me time but has also allowed me to unlock new potentials in data presentation and analysis.

Conditional Formatting with Copilot - Date Fields
Remember Copilot's Learning Curve
As powerful as Copilot is, remember it's still learning. If it doesn't get your request right the first time, refine your instructions. Over time, it will become more attuned to your conditional formatting needs.
By incorporating these tips, you can leverage Copilot to its full potential, making your Excel spreadsheets not only more visually appealing but also more informative and easier to analyze.
Conclusion
Mastering conditional formatting in Excel with Copilot has opened new doors to data analysis and presentation. Through practical examples, we've seen how Copilot simplifies complex tasks, making conditional formatting more accessible to all users. Whether it's highlighting critical data points, identifying trends, or detecting errors, Copilot serves as a powerful ally.
Key Takeaways
- Conditional formatting can transform raw data into visually impactful information. - Copilot makes applying conditional formatting rules straightforward, saving time and effort. - Being specific with Copilot instructions enhances the accuracy of the applied formatting. - Continuous experimentation with Copilot can lead to discovering more advanced formatting techniques.
In conclusion, the journey into Excel's conditional formatting with Copilot not only enhances our spreadsheets but also deepens our understanding of data analysis. As we continue to explore and apply these techniques, our ability to quickly interpret and act on data improves significantly. Remember, the key to mastering conditional formatting lies in practice and experimentation. So, dive in, explore with Copilot, and unlock the full potential of your data.


