Snagit 2021 - Simplify and Magnify - Two New Features


Posted on: 10/26/2020
**Snagit** is a screen capture program developed by Techsmith. Not only have I been using **Snagit** for years, and it is my favorite screen capture software, I also use **Camtasia,** which I use to record all my YouTube videos.
In this article, I want to talk about two new features inside **Snagit 2021** that has just been released on October 20th - **Simplify** and **Magnify**.
1. Simplify
I am a huge fan of the **Simplify** feature, and it has just been improved with version 2021. We will look at Snagit's Simplify and how it works with an email example, but I could use Simplify with a web page capture or an application like Excel or Word.
I will work with Outlook, and I want to capture a screenshot of my inbox, and show one of my emails, but I don't wish to blur all the other emails. This is a great example of when to use Simplify. Blur would work, but in this case, I prefer Simplify.
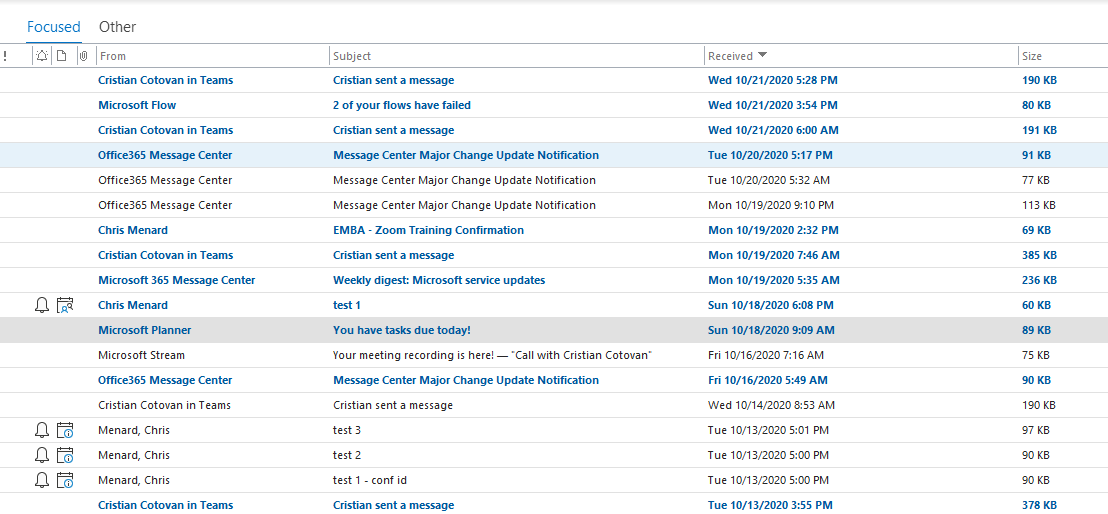
I'm going to use the **Simplify** tool to spotlight only one email.
**Step 1** \- Open the the **Snagit capture window,** and while it is set on **Image.** I can either use the PrintScreen key or the big red **Capture** button.
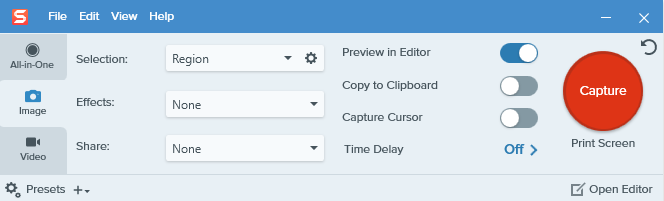
**Step 2 -** To capture the image, I use the **gold crosshairs** on my screen. I have to **draw a selection** of the area I want to be captured with the information I need.
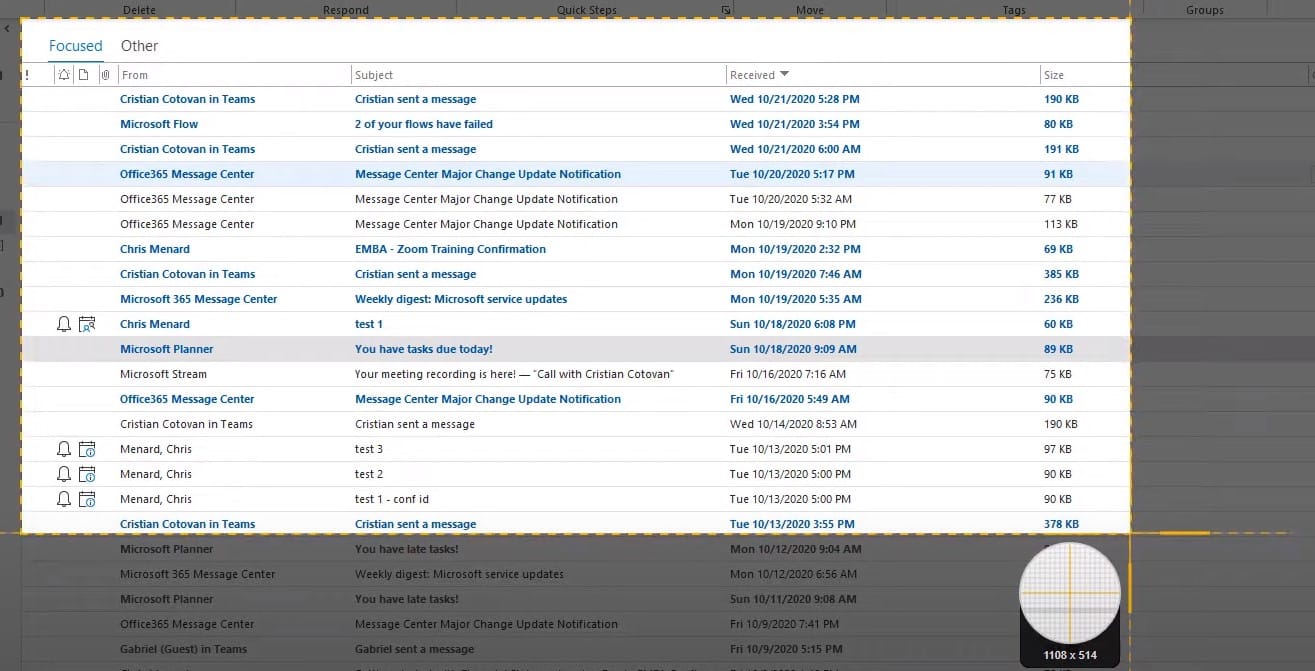
**Tip:** If you want to capture a specific window or an area from that program window, you will notice that it will highlight them while you move your cursor around when you are in capture mode.
Right after you choose the capture area, you will be automatically brought into the **Snagit Editor,** where you have all the tools you need to process and edit your captured image. The Editor is where you will find the **Simplify button.** Snagit 2021 has _two_ parts the Capture window and the Snagit Editor.
- Capture is for capturing your screenshots. You can capture a region, as I did, or you can capture a window, a scrolling window, or multiple captures at one time. Snagit 2021 also allows you to create a video, but I'll cover that in another video. - After capturing, you end up in the Editor, or **Snagit Editor** window. This is where you do callout, text, and your commands are located. The screenshot below shows the Editor.
**Step 3** - You can see in the top right corner that there is the **Auto Simplify** panel, and by default, it is **Off**. You can leave it as it is and manually choose between those different styles below.
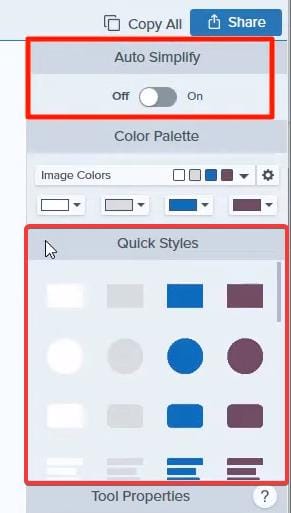
**Tip:** In case you're wondering where did these colors from the color palette come from, you should know that it automatically picks colors from the **selected** screen capture. The colors in the color palette change depending on how the screenshot looks like, so you will have a range of colors to customize and styles of simplify selection. If you switch in between your captured images, you will notice the colors change accordingly. You can manually change colors because the **Auto-simplify is Off.**
**Another Tip:** Even after you are done with the editing and everything is set, you can still change the color palette without affecting what you did so far or having to redo it all over again.
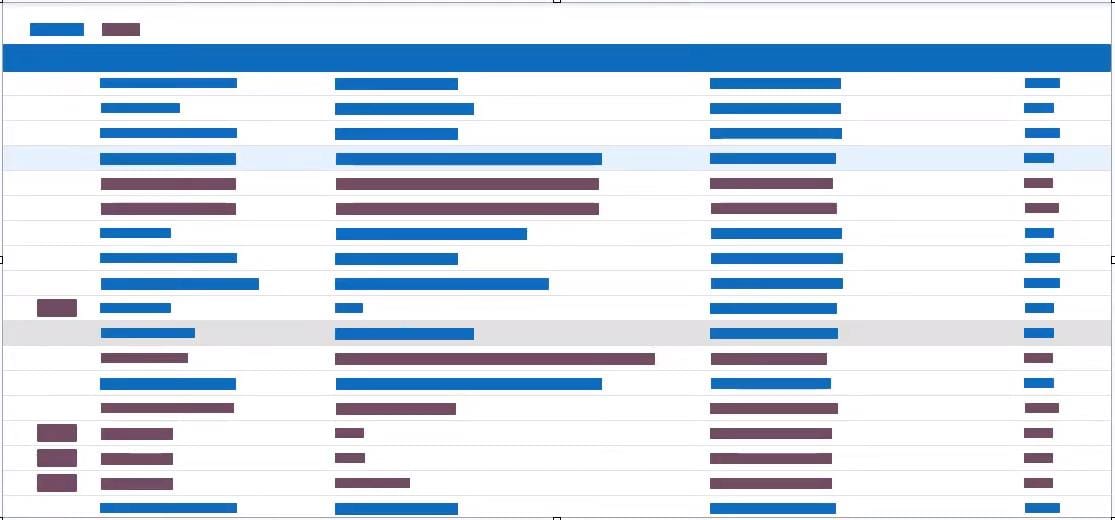
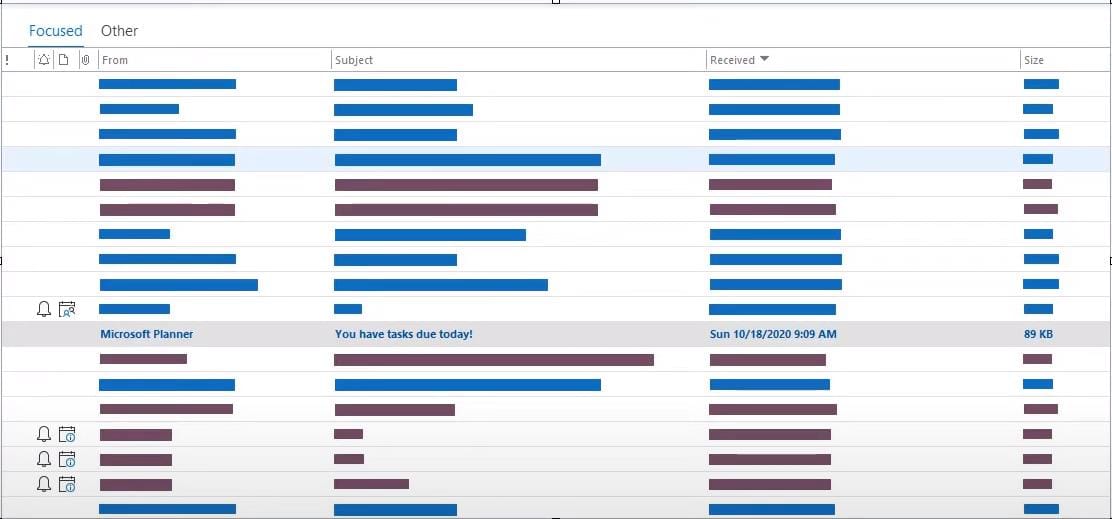
**Step 4 -** If you switch **Auto-Simplify** **On** it will automatically detect your emails, lines and all content inside your capture, and it will look like they are redacted:
I need to see the content or email that I want to show in the screenshot. I need to turn on Move and Show Original.
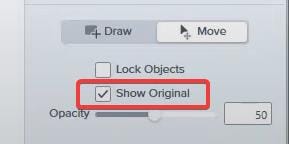
**Step 5 -** To do that go to the **Tool Properties** panel on the right and switch from **Draw** to **Move**. Move allows you to remove elements from what's been simplified.
**Step 6 -** To see what to remove, check called " **show original**".
Now you can see the content behind the simplified lines and choose what you want to reveal.
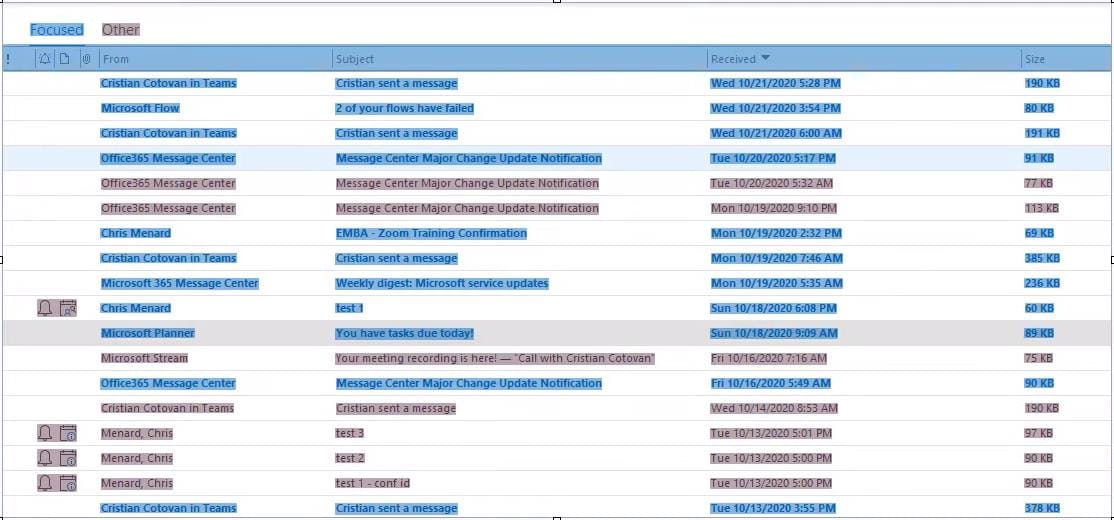
**Step 7 -** Choose the line with the information you want to leave public,and **Delete** it. Each one of the highlights are individual objects that can be deleted, moved, adjusted:

You can repeat this operation for all the other elements and content that you are interested to be visible, like dates, and icons.
**Step 8 -** After you are done removing content and decided on what should be visible, simply uncheck the " **show original**" button from the right panel and your new capture image is edited and good to go.
2. Magnify
Now that your image was edited using **Simplify**, if you want to make that line stand out a little bit you can just do that with **Magnify. Magnify** allows you to increase the size of various regions and emphasize or make them 'pop' to draw the viewer's attention to them.
Here are the steps to achieve that:
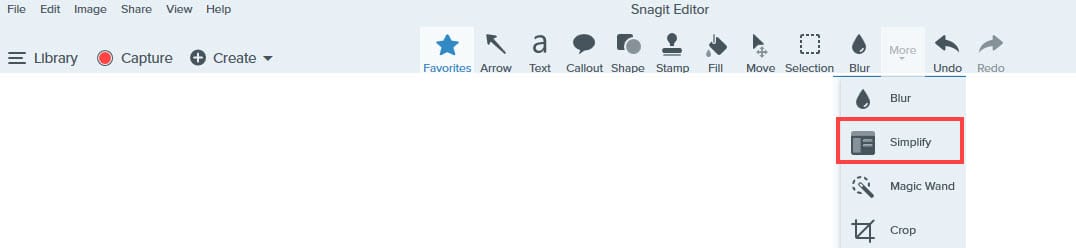
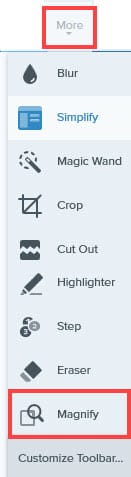
**Step 1 -** Go to the top header **Tools Bar**, click on **More** and choose **Magnify** from the drop-down menu.
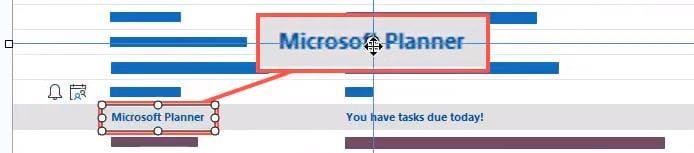
**Step 2 -** Go to the begining of the row you want to highlight and with your mouse **drag a rectangle around** the chosen word.

**Step 3 -** After the selected word changes its size, click in the middle of it and drag it where you want to move it.
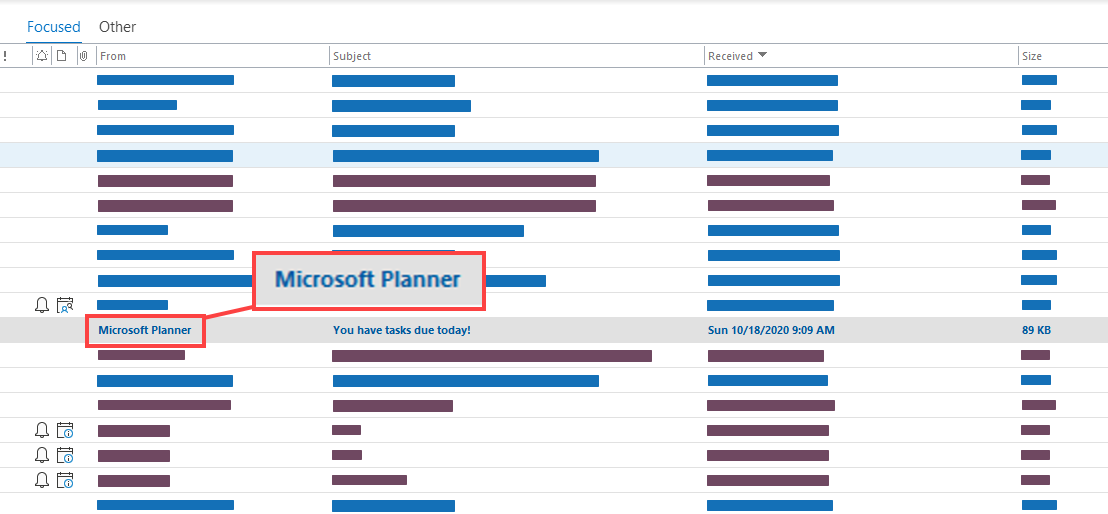
And there you have it.
US & International:
TechSmith US Store: [https://techsmith.z6rjha.net/c/1339065/481530/5161](https://techsmith.z6rjha.net/c/1339065/481530/5161)
Snagit US Store: [https://techsmith.z6rjha.net/c/1339065/476802/5161](https://techsmith.z6rjha.net/c/1339065/476802/5161)
Snagit US Upgrade: [https://techsmith.z6rjha.net/c/1339065/529043/5161](https://techsmith.z6rjha.net/c/1339065/529043/5161)
Europe:
TechSmith Germany Store: [https://techsmith.z6rjha.net/c/1339065/479389/5161](https://techsmith.z6rjha.net/c/1339065/479389/5161)
TechSmith France Store: [https://techsmith.z6rjha.net/c/1339065/400533/5161](https://techsmith.z6rjha.net/c/1339065/476802/5161)
TechSmith Spain Store: [https://techsmith.z6rjha.net/c/1339065/617746/5161](https://techsmith.z6rjha.net/c/1339065/476802/5161)
APAC:
Techsmith Japan Store: [https://techsmith.z6rjha.net/c/1339065/400535/5161](https://techsmith.z6rjha.net/c/1339065/400535/5161)
Snagit 2021 - Simplify and Magnify - Two New Features